Troubleshooting Local Cache playback issues

Summary
- Local Cache streams cached videos over your school network.
- Open the Admin Console to check status.
- Sign in once with your institution account during initial setup.
- Create separate Admin Console credentials for ongoing access.
- If Offline, confirm ClickView Local Cache is running in services.msc.
- Check ports: 9054 (HTTP) and 9055 (HTTPS).
- Update the Secure port in config.json if there’s a port conflict.
- If using a proxy, set it in the Admin Console and Windows Internet Options.
How Local Cache playback works
Local Cache stores ClickView videos on a local server so that once a video has been cached, future playback can stream over your local network (LAN) instead of from the cloud.
It’s normal for some videos to still play from the cloud even after Local Cache is set up. If a video is being watched for the first time on your network (or the cache was cleared or resized), ClickView will stream it from the cloud until caching is complete. After that, the next playback will stream from Local Cache.
Before you start
Before following the troubleshooting steps below, confirm these basics:
- Local Cache is installed and setup is complete.
- You can open the Local Cache Admin Console in a browser at http://localhost:9054.
- You have access to the server (or device) where Local Cache is installed, so you can check Windows Services and local configuration files if needed.
- If you recently changed storage locations, cache size, or performed an update, re-test playback after confirming the cache is Online.
Helpful related guides:
- Install and set up ClickView Local Cache
- Manage Local Cache storage locations
- How to manage Local Cache settings
Identifying your institution and signing in
During the initial Admin Console configuration, you’ll be prompted to authenticate using your institution’s ClickView credentials (typically by entering your institution email and signing in).

This one-time sign-in links the Local Cache installation to your institution’s ClickView account so ClickView can recognise and manage the cache. After this step, you won’t normally need to sign in with institution credentials again.
Creating Local Cache Admin Console credentials
After the institution sign-in, you’ll be prompted to create a username and password for the Local Cache Admin Console.
Keep these points in mind:
- The username must not be an email address.

- The password must be at least six characters.
- Store these credentials somewhere secure, as they’re used for future Admin Console access.

If you can’t access the Admin Console because these credentials are lost, you may need to involve your IT team or contact ClickView Product Support.
Check the Local Cache service status
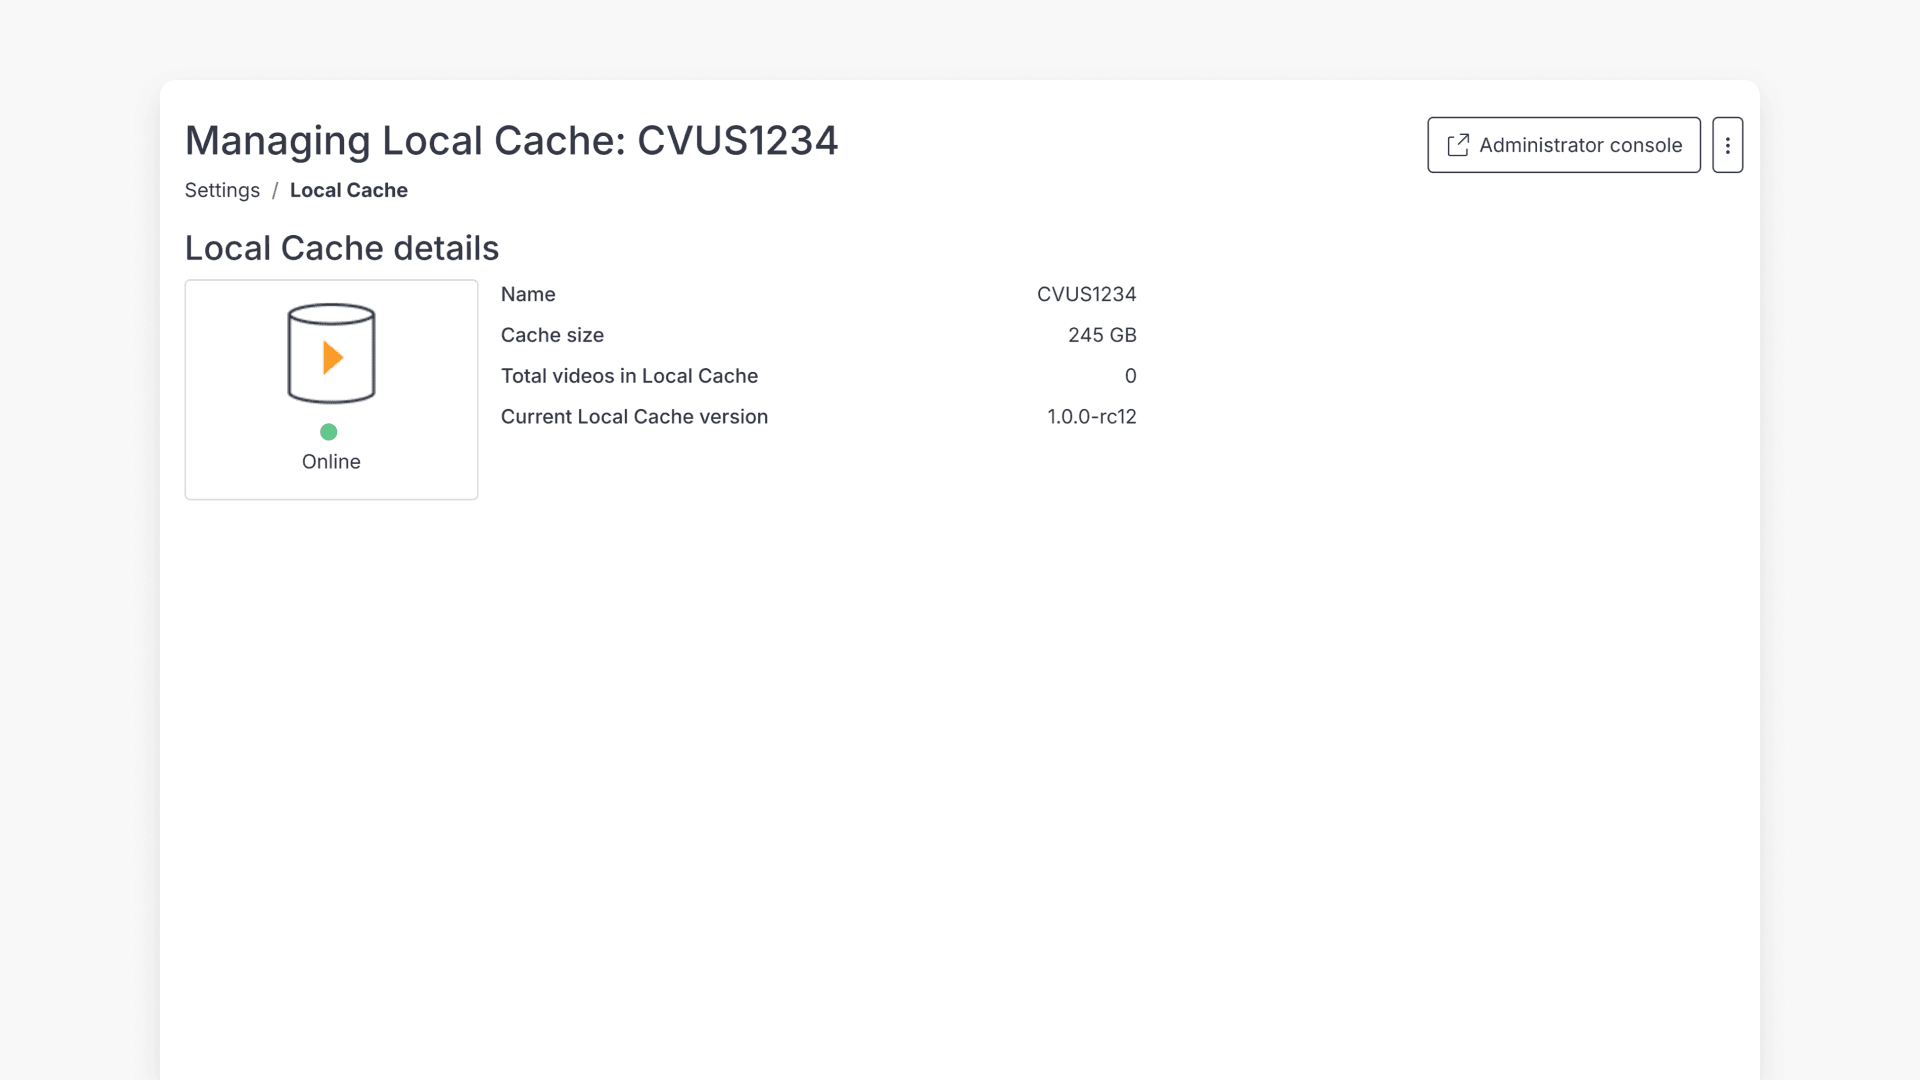
Confirm Local Cache is Online
- Open http://localhost:9054 in Google Chrome or Mozilla Firefox. (Internet Explorer is not recommended.)
- Check the status indicator on the page:
- Online (green dot) means Local Cache is running.

- Connecting or Offline means the service needs attention.

- Online (green dot) means Local Cache is running.
- If the page shows a Fix this error option, select it and follow the recommended steps shown in the Admin Console.
Tip: If you can’t reach http://localhost:9054 at all, jump to Confirm the Windows service is running below.
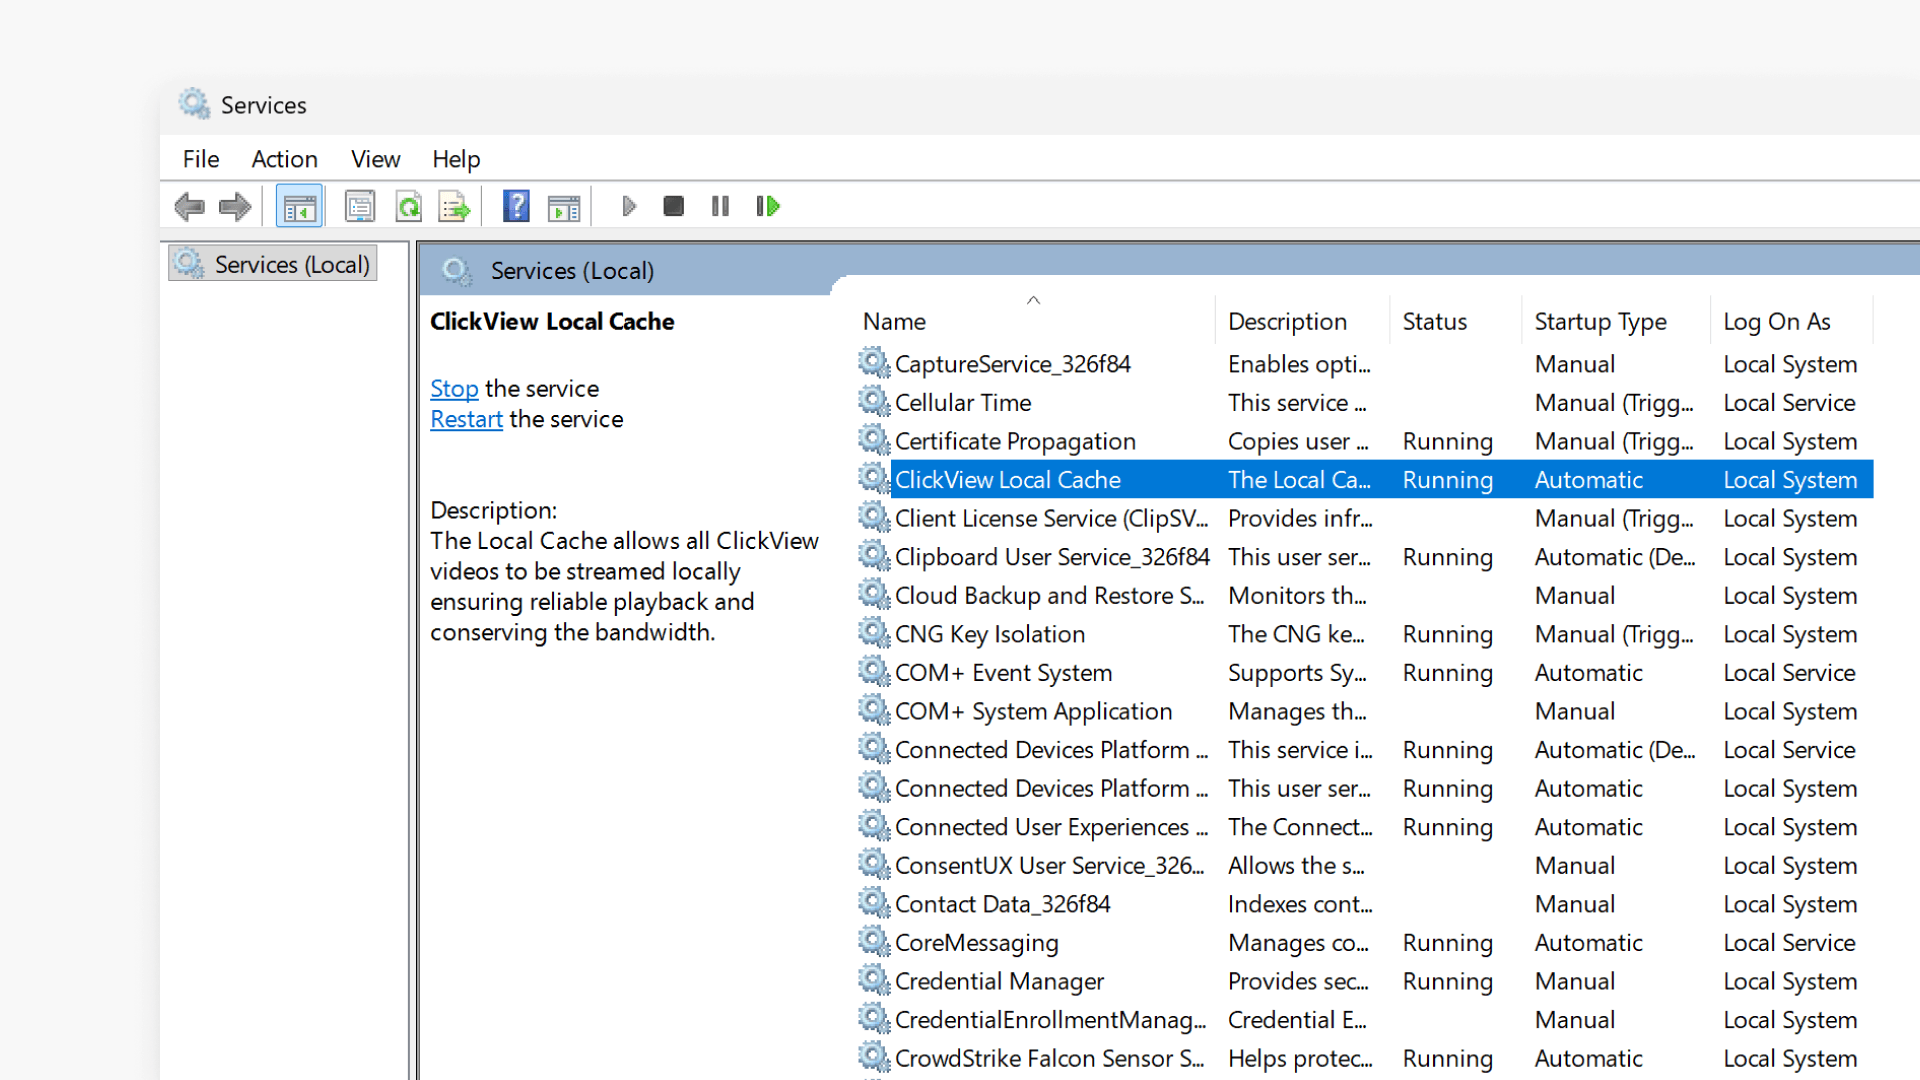
Confirm the Windows service is running
If Local Cache is not Online (or the Admin Console won’t load), confirm the Windows service is running:
- Open services.msc: Go to Start > Run, type services.msc, then press Enter.

- Locate ClickView Local Cache.
- Confirm the Status shows Running.

- If it isn’t running:
- Right-click ClickView Local Cache and select Start.
- Return to http://localhost:9054 and check whether the status is now Online.
If the service will not start, or stops again shortly after starting, capture any error message and contact Product Support.
Resolving port and protocol issues
Local Cache uses different ports depending on whether you are accessing it over HTTP or HTTPS:
- HTTP uses Port 9054
- HTTPS uses Port 9055
If you see playback errors related to HTTP/HTTPS, it usually indicates a port conflict or blocked port.
To resolve:
- Confirm the required port is open on:
- The Local Cache server/device
- Any internal firewall rules on your network
- If your environment can’t use the default secure port, update the Secure port setting in the Local Cache config.json to a port that is:
- Open
- Not already in use by another service

- Edit the config.json to update the Secure port value.


- Save the file (you may need to stop the ClickView Local Cache service first to save changes).
Restart the ClickView Local Cache service in services.msc. - Re-test playback and confirm you are using the correct protocol (HTTP or HTTPS) for your environment.
Ensuring proxy settings are correct
If your school uses a proxy, Local Cache can appear Offline or fail to stream properly unless proxy settings are configured in both places below.
1. Local Cache Admin Console
In the Admin Console, enter:
- Proxy address
- Proxy port
- Proxy username and password (if required)

2. Windows Internet Properties
- Open Internet Options:
- Search Internet Options, or press Windows Key + R and run inetcpl.cpl
- Go to Connections > LAN settings

- Enable Use a proxy server for your LAN
- Disable any automatic configuration options and use manual proxy settings
- Select Bypass proxy server for local addresses
- Select Advanced and add these exceptions (separated by semicolons):
- Your server IP
- 127.0.0.1
- local.clickviewlocalcache.com

After updating proxy settings, restart the Local Cache service and test playback again.
Frequently asked questions
Get in touch
If you’re having trouble finding the right topics or videos, just reach out! Our team - 

 Akhil, Daniel, Jalaj, or any of us at ClickView - will be happy to help you get sorted.
Give feedback
Was this guide helpful?
Up Next
How to manage Local Cache settings
Discover how to access and manage Local Cache settings in ClickView, including storage details, software updates, and video playback settings.