How to set up Microsoft Entra SSO for your Peak body using the new SAML process

Summary
- Create a new Enterprise Application in the Microsoft Entra portal, assign staff and student groups, and collect the Object ID for each group to share with ClickView Support.
- Exchange two emails with ClickView Support: first to receive your Identifier and Reply URL, then to send your downloaded Base64 certificate, Login URL, and Microsoft Entra Identifier.
- Configure SAML settings, including the Identifier, Reply URL, and Logout URL, then set the Name ID format to Persistent using
user.objectidas the source attribute. - Map user attributes for role and grade identification using either Group Claims or a custom attribute, depending on how your Entra environment is structured.
- Map a separate attribute for school assignment within the peak body, then download and complete the school list spreadsheet and send it to ClickView Support to finalise the configuration.
This guide walks IT administrators through connecting ClickView to their Microsoft Entra environment using SAML-based Single Sign-On. Once complete, staff and students across your peak body can access ClickView using their existing Microsoft credentials.
Before you start: This setup requires email exchanges with ClickView Support at defined points. Each phase builds on the last, so work through them in order.
- Phase I: Create the ClickView app in Entra and assign user groups
- Phase II: Configure SAML single sign-on
- Phase III: Set user attributes and claims to complete the integration
Phase I: Creating the application
Step 1: Create a new Enterprise Application
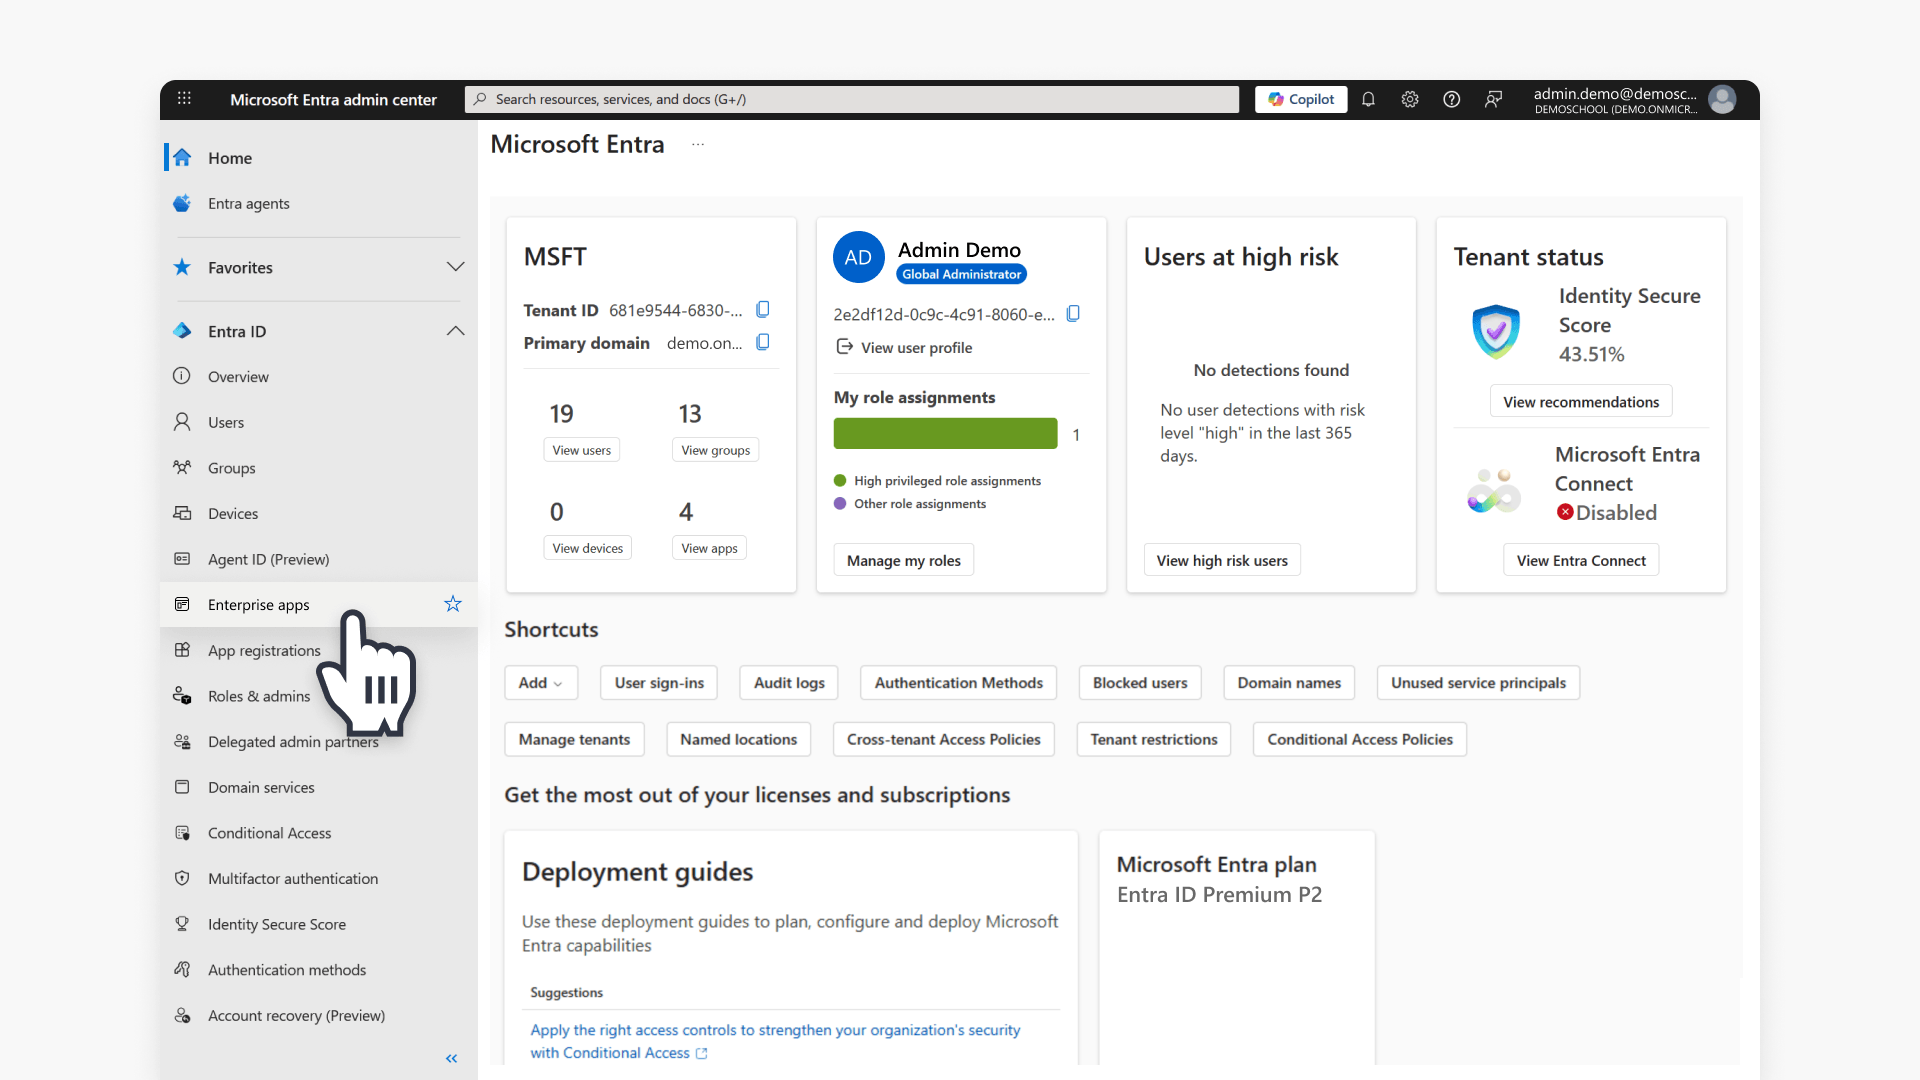
- Sign in to the Entra portal with an admin account and select Enterprise applications.

- Within Enterprise applications, select + New application.

- Select + Create your own application.

- In What’s the name of your app?, enter ClickView. Select Integrate any other application you don’t find in the gallery (Non-gallery), then select Create.

Step 2: Assign users and groups
- Under the application’s menu, select Assign users and groups, then select + Add user/group.

- Select the None Selected option.

- Select all the staff and student groups to be assigned to the ClickView app, select Select, then select Assign.


All assigned staff and student groups now have access to the ClickView application through SSO.

Step 3: Collect Group Object IDs
ClickView Support needs the Object ID of each group you assigned.
- In the app, go to Users and groups and select one of the assigned groups.

- Copy the Object ID value.

- Repeat for every assigned group and keep a list.
Contact ClickView Support:
Email #1: Send an email to support@clickvieweducation.com requesting:
- The Identifier (Entity ID) and Reply URL (Assertion Consumer Service URL) for your institute
- Include the Object IDs for all assigned groups (from Step 3)
ClickView Support replies with your Identifier and Reply URL. Wait for this reply before continuing.
Phase II: Configuring SAML Single Sign-On
Step 4: Select SAML as the sign-on method
- Open your ClickView app in Entra and select the Set up single sign-on tile, then select SAML under Single Sign-On.

Step 5: Add identifier URLs
- In the Basic SAML Configuration tile, select Edit.

In the Basic SAML Configuration window, select Add identifier to edit Identifier (Entity ID), and Add reply URL to edit Reply URL (Assertion Consumer Service URL), using the values below.
Field | Value |
Identifier (Entity ID) | Provided in the reply email from the ClickView Support team |
Reply URL (ACS URL) | Provided in the reply email from the ClickView Support team |
Logout URL | https://login.windows.net/common/oauth2/logout |
Sign on URL | Leave blank (provided after onboarding) |

Step 6: Download the certificate and copy URLs
- Scroll to SAML Certificates (Step 3 on the Entra page) and download the Certificate (Base64).

Then scroll to Set up ClickView (Step 4) and copy both:
- Login URL
- Microsoft Entra Identifier

Contact ClickView Support:
Email #2: Reply to the same email thread as Email #1 (or start a new email to support@clickvieweducation.com) and attach:
- The Certificate (Base64) file
- The Login URL
- The Microsoft Entra Identifier
If any of your SAML attributes differ from what’s shown in this guide, mention the differences in this email. ClickView Support confirms once the setup is complete on their end. Continue to Phase III while you wait.
Phase III: Set User Attributes & Claims
Complete this phase while waiting for Support’s confirmation.
Step 7: Set up attributes
- Go to the Attributes & Claims tile and select Edit.

- Confirm the default attributes are present:
- givenname
- surname
- emailaddress
- name
- Select the Unique User Identifier (Name ID) claim

- In the ‘Name identifier format’, select the ‘Persistent’ option:

- In the Source attribute drop-down, select user.objectid.

Step 8: Map attributes for user roles and grade levels
ClickView needs to know which users are staff and which are students, and for students, their year level. Choose the method that fits your Entra environment.
Option A: Use Group Claims (recommended)
If your groups already reflect staff/student roles and year levels, the group claim covers this. To add a group claim:
- Select + Add a group claim.

- Select Groups assigned to the application, select the Group ID option, then select Save.

Option B: Add a custom attribute
If you use a separate attribute in Entra for role or grade identification, add it as a custom claim:
- In the Attributes & Claims tile, select Edit, then select + Add new claim.
- Enter a Name for the claim, using a single word with no spaces (for example,
departmentoryearLevel). - Select the Source attribute whose values identify the user’s role or year level.
- Select Save.
Note: Attribute names and values vary depending on your environment. The example above is for illustration only, and your actual attribute names and source attributes may differ
Step 9: Map an attribute for school assignment
For peak body environments, ClickView also needs to identify which school within the peak body each user belongs to. This requires a separate attribute mapping, using the same process as Step 8.
Option A: Use Group Claims
If your groups already identify which school a user belongs to, and you added the group claim in Step 8, no additional configuration is needed.
Option B: Add a custom attribute
If a different attribute identifies a user’s school, add it as a custom claim:
- Go to the Attributes & Claims tile and select Edit.

- Select + Add new claim.

- Enter a Name for the claim, using a single word with no spaces, and select the Source attribute whose values identify the user’s school

Note: This is an example for demonstration only. The actual attribute names and source attributes vary depending on your environment.
Step 10: Share attribute details with ClickView Support
Once you have confirmed your attribute mappings for both role/year and school assignment:
- Download the peak body /School List spreadsheet.
- Complete the spreadsheet and email it to support@clickvieweducation.com, including the attribute names and values you used for staff, students, year levels, and school assignment.
Once ClickView Support confirms the setup is complete on their end, your users can sign in to ClickView via SAML SSO through Microsoft Entra. Test the login at https://clickview.net/.
Quick reference
Phase | What you do | Then |
Phase 1 | Create app, assign groups, collect Object IDs | Send Email #1 to ClickView Support and wait |
Phase 2 | Configure SAML settings, download certificate | Send Email #2 to ClickView Support and wait |
Phase 3 | Map basic attributes, configure role + school identification | Email completed spreadsheet containing attribute details to Support team. Test the login after confirmation via: https://clickview.net/ |
Frequently asked questions
Get in touch
If you’re having trouble finding the right topics or videos, just reach out! Our team - 

 Akhil, Daniel, Jalaj, or any of us at ClickView - will be happy to help you get sorted.
Give feedback
Was this guide helpful?
Up Next
How to set up Google Workspace SSO for your School using the new SAML process
Summary How do I set up Google Workspace SAML SSO for ClickView at my school? To set up SAML SSO for ClickView, create a custom SAML app in your Google Workspace Admin console and send your SSO URL, Entity ID, and certificate to ClickView Support, who will reply with your school-specific ACS URL and Entity […]