How to set up Microsoft Entra SSO for your District

Summary
- Sign in to the Microsoft Entra admin center.
- Create a non-gallery Enterprise application named “ClickView”.
- Go to Single Sign-On and select SAML.
- Enter your region Identifier and Reply URL in Basic SAML Configuration.
- Review Attributes & Claims, then add required claims and a Security groups claim.
- Submit your App Federation Metadata URL and Security group info.
Set up ClickView with Microsoft Entra for districts
Follow these steps to integrate ClickView with Microsoft Entra for district-wide Single Sign-On (SSO). This setup is intended for district administrators and central IT teams managing SSO across multiple schools using shared security groups and SAML authentication.
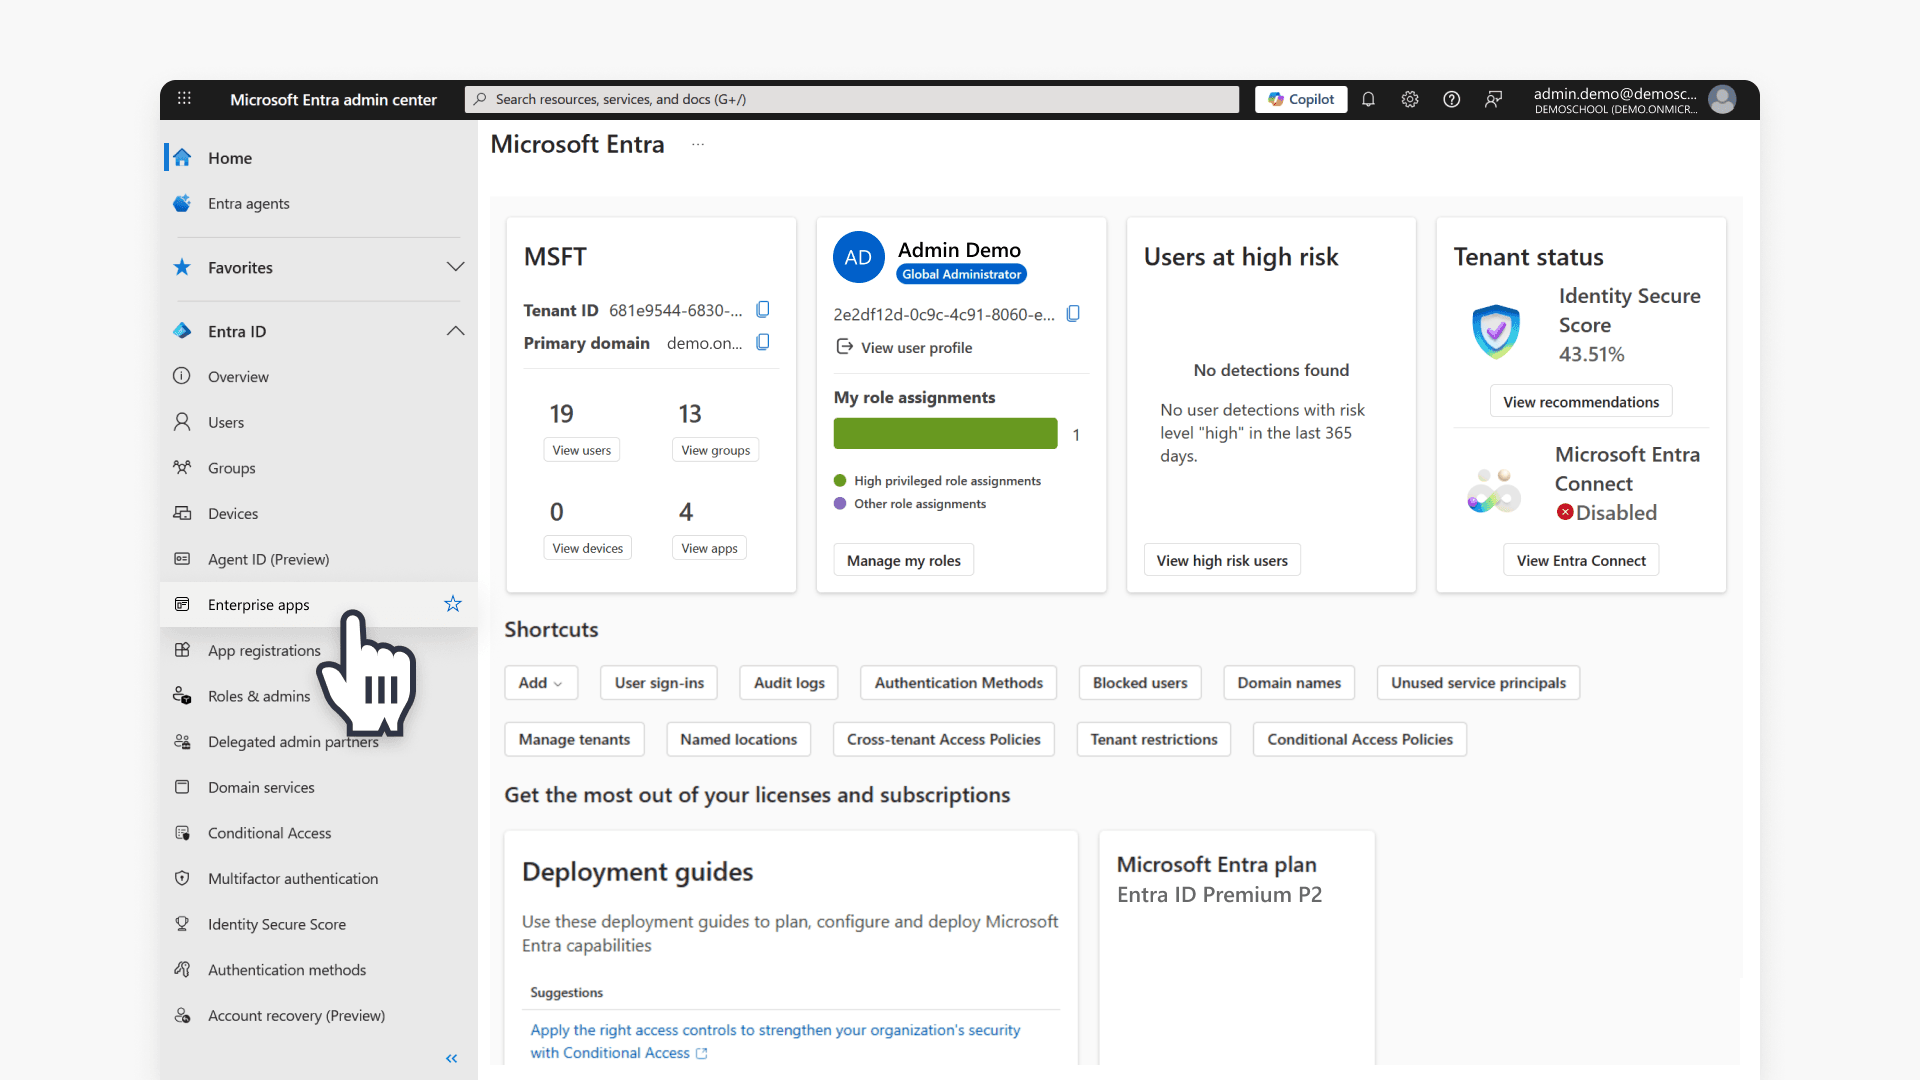
- Sign in to the Entra portal. Go to Identity, then Applications, and Enterprise applications.
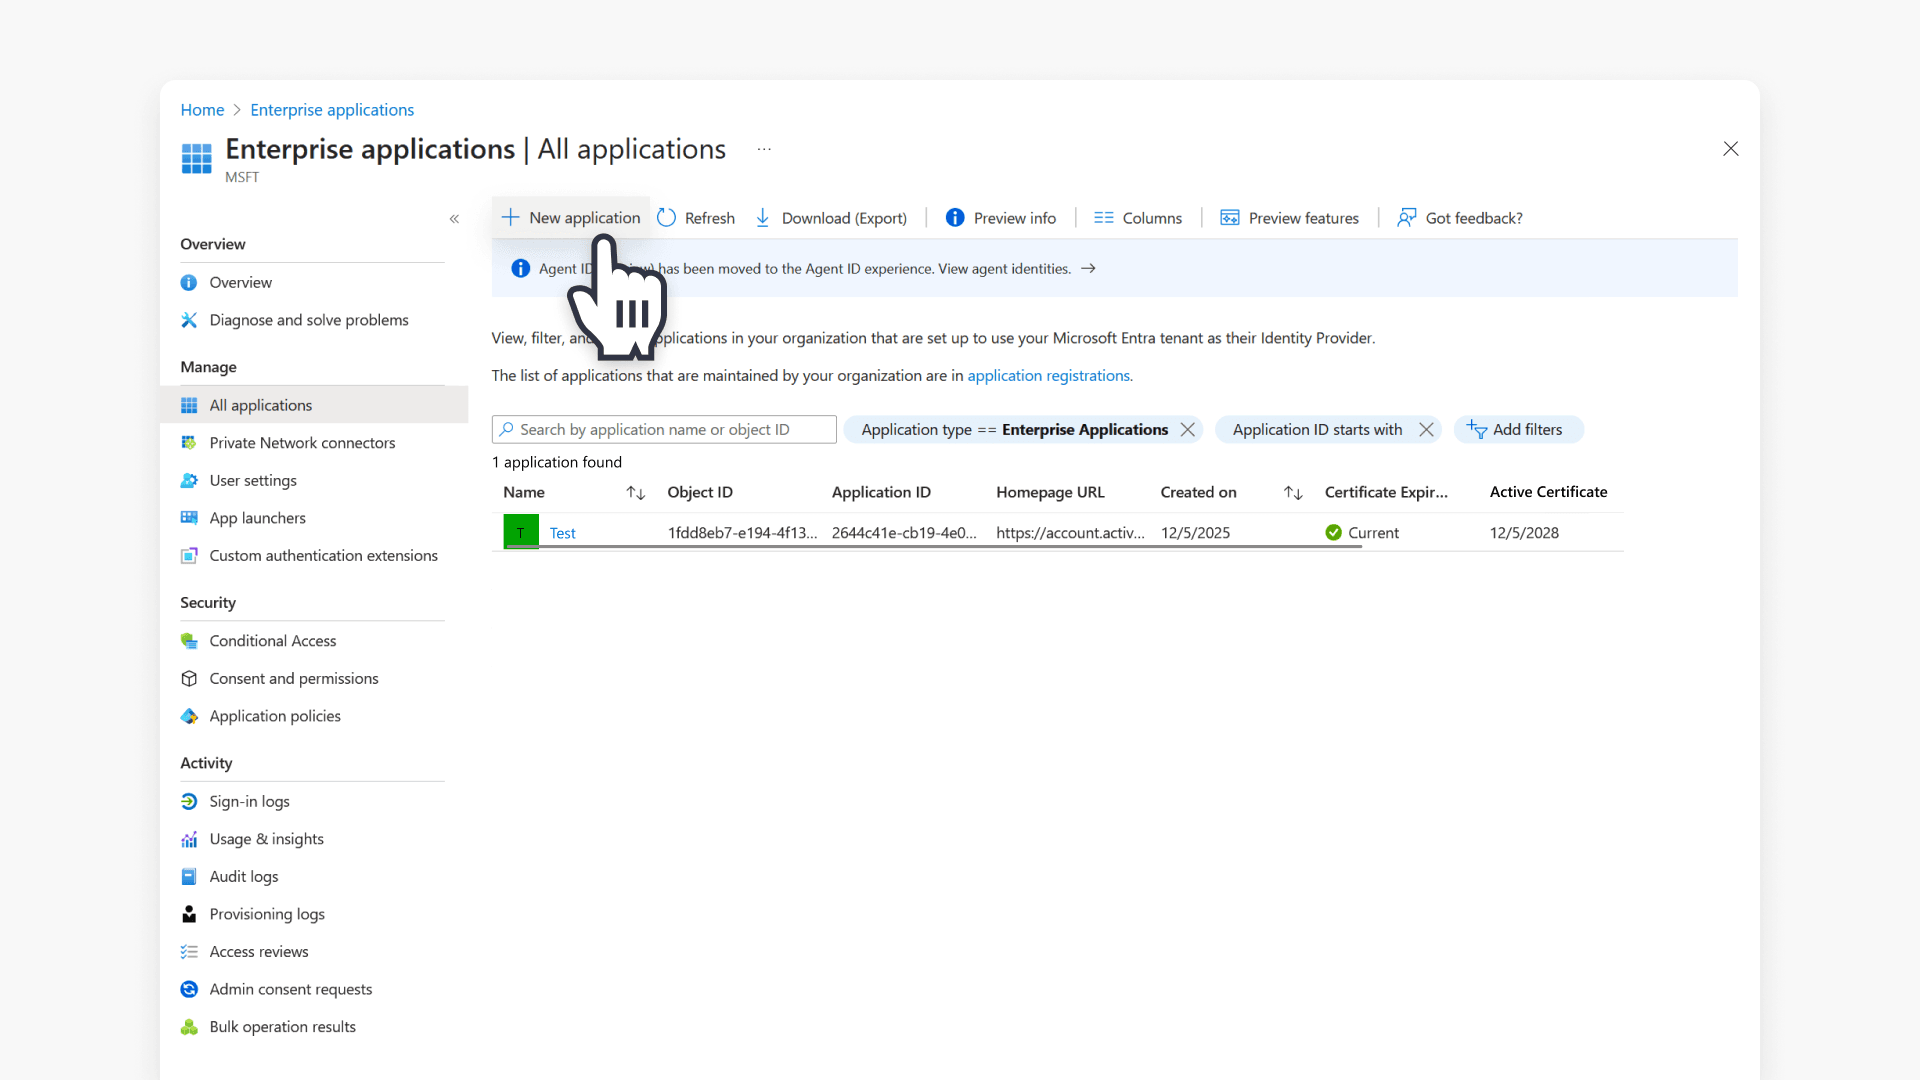
- Within Enterprise applications, select +New application.
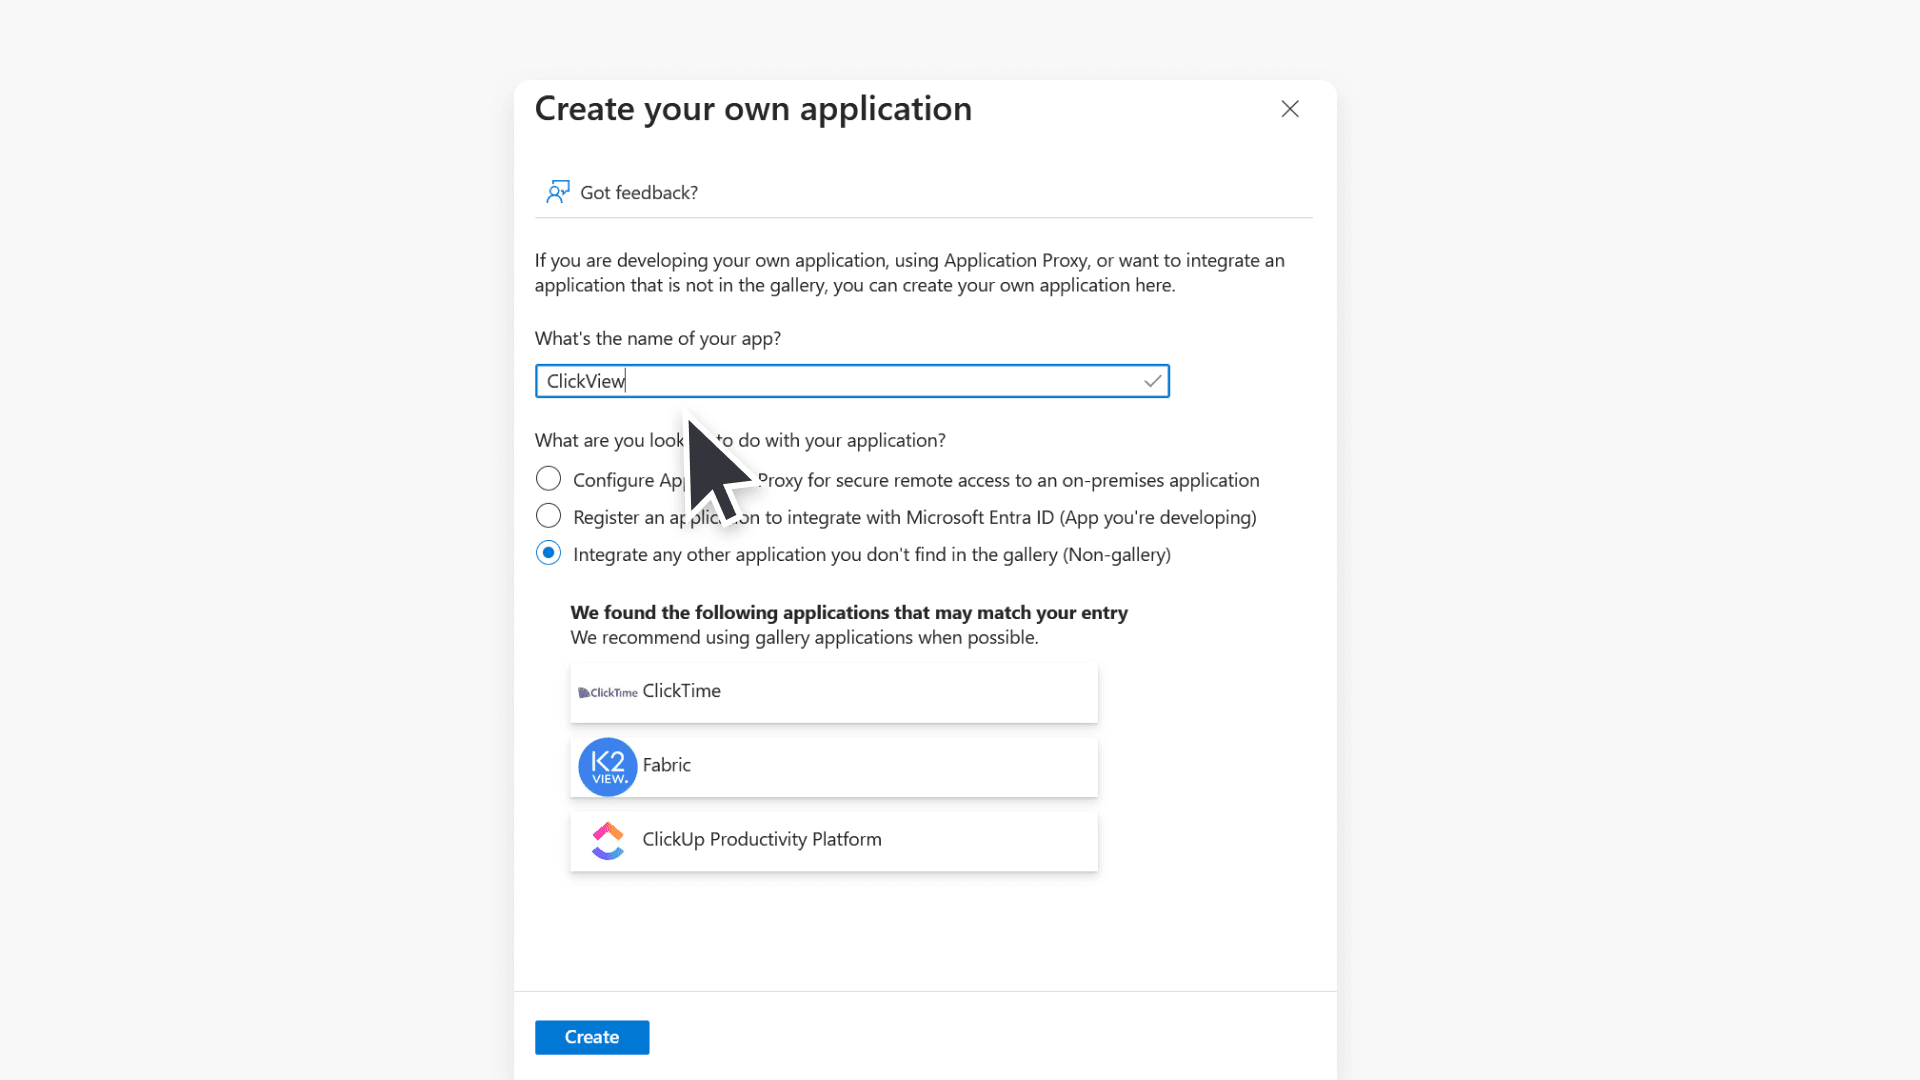
- Then select +Create your own application.
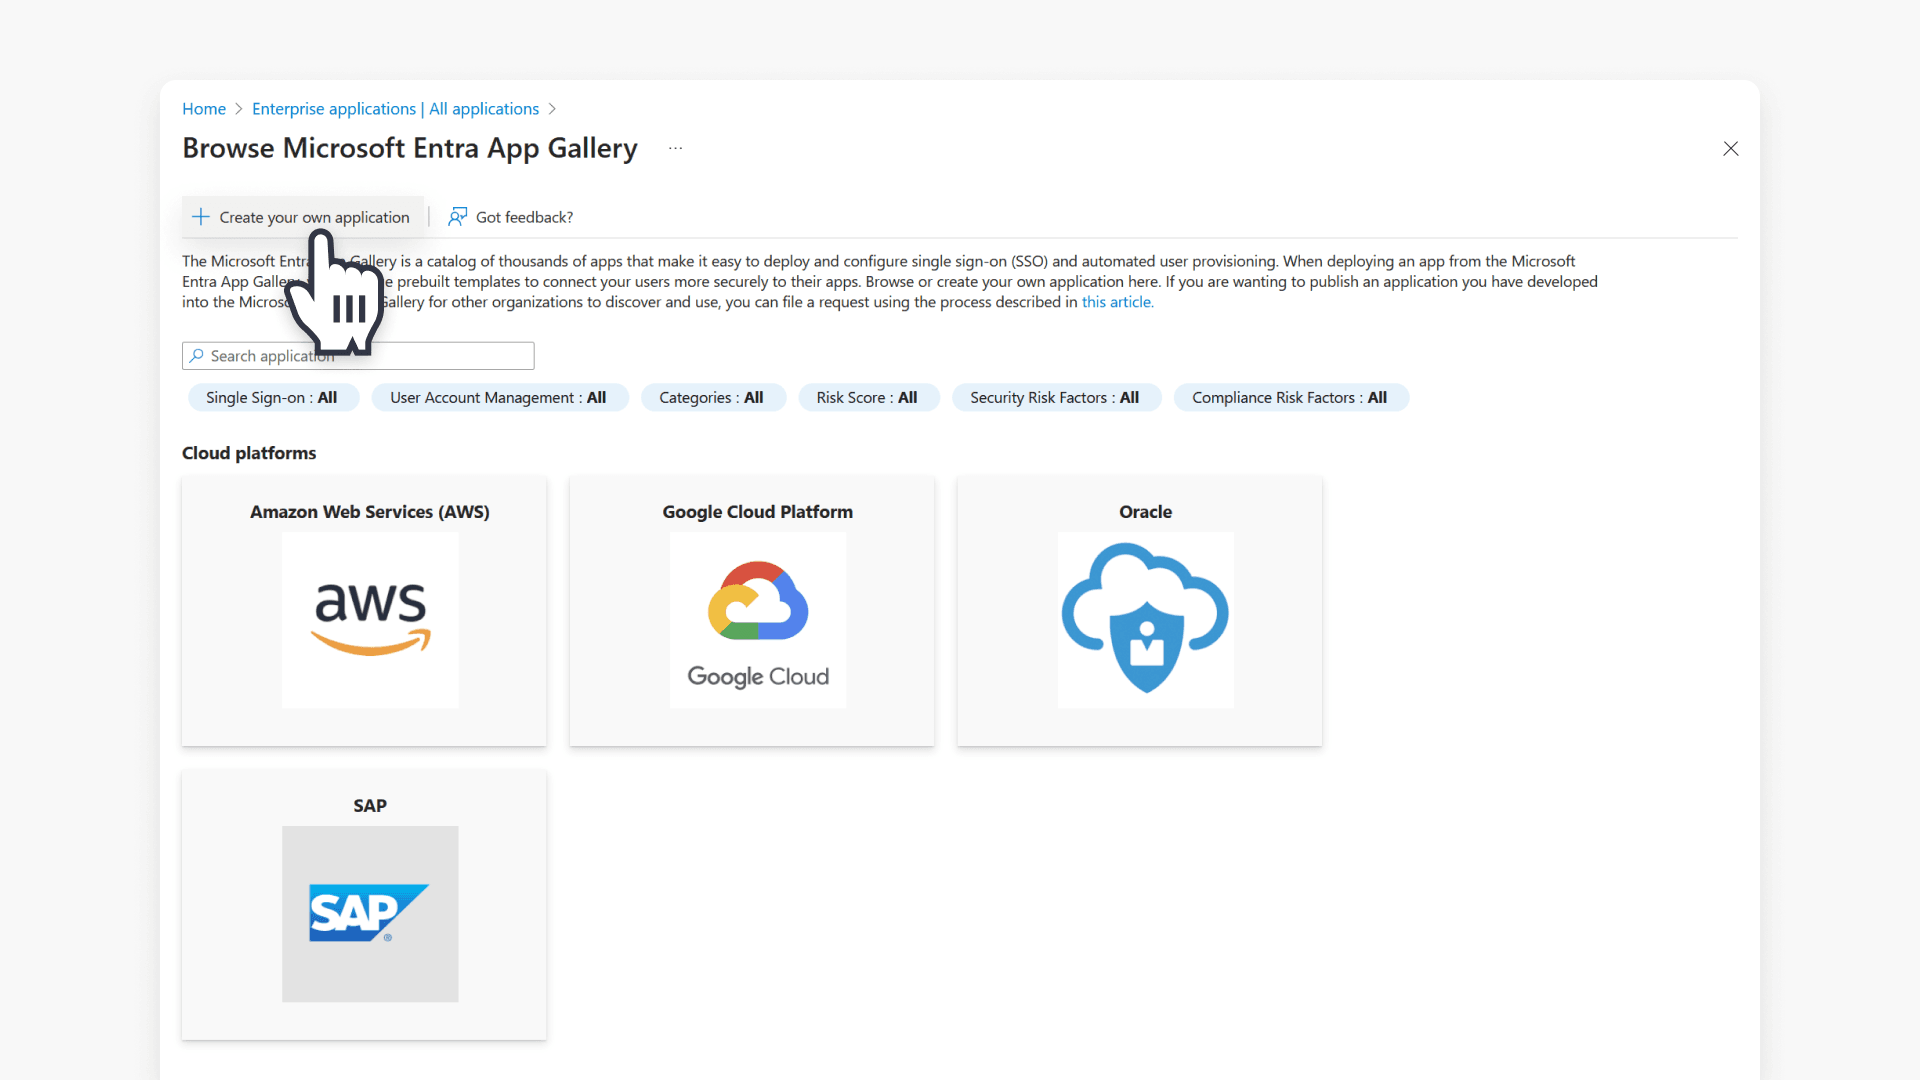
- Where it asks for ‘What’s the name of your app?’, enter ‘ClickView’. Choose Integrate any other application you don’t find in the gallery (Non-gallery) and click Create.
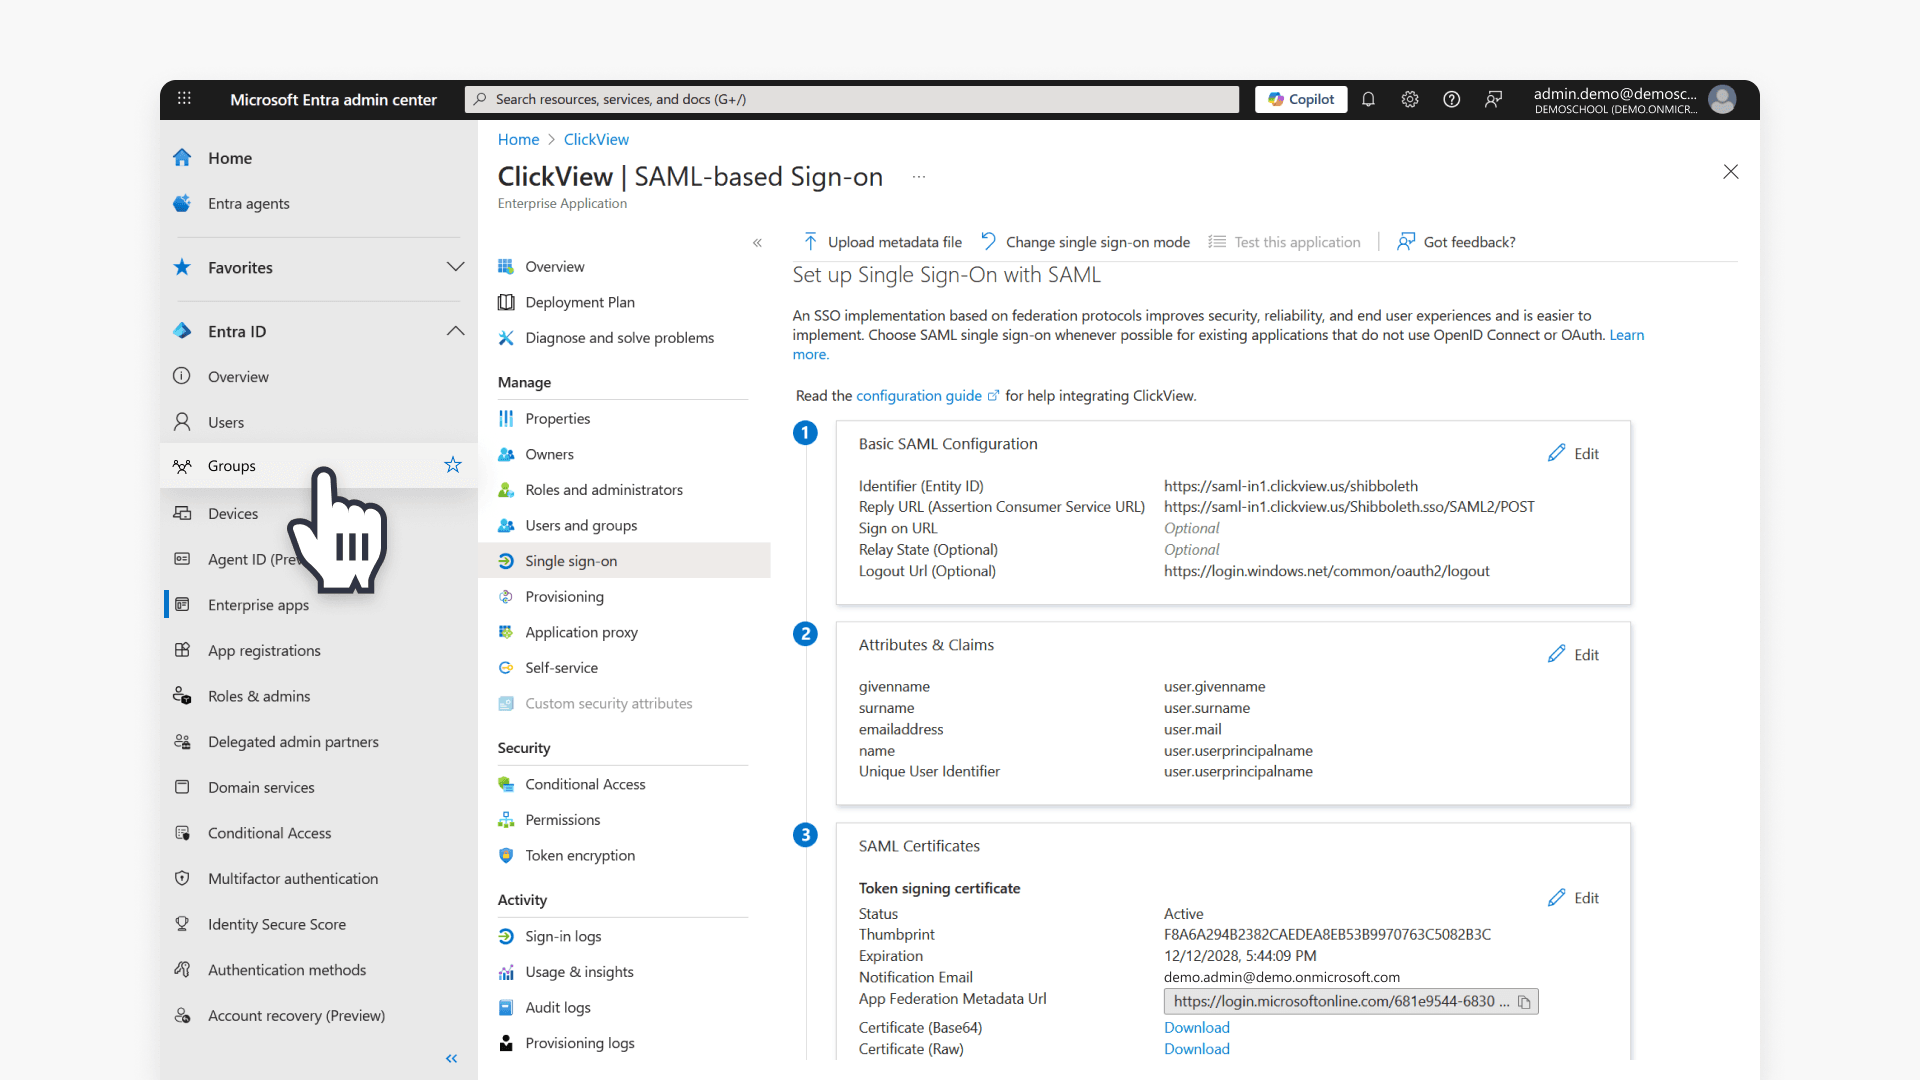
Configure SAML single sign-on for ClickView
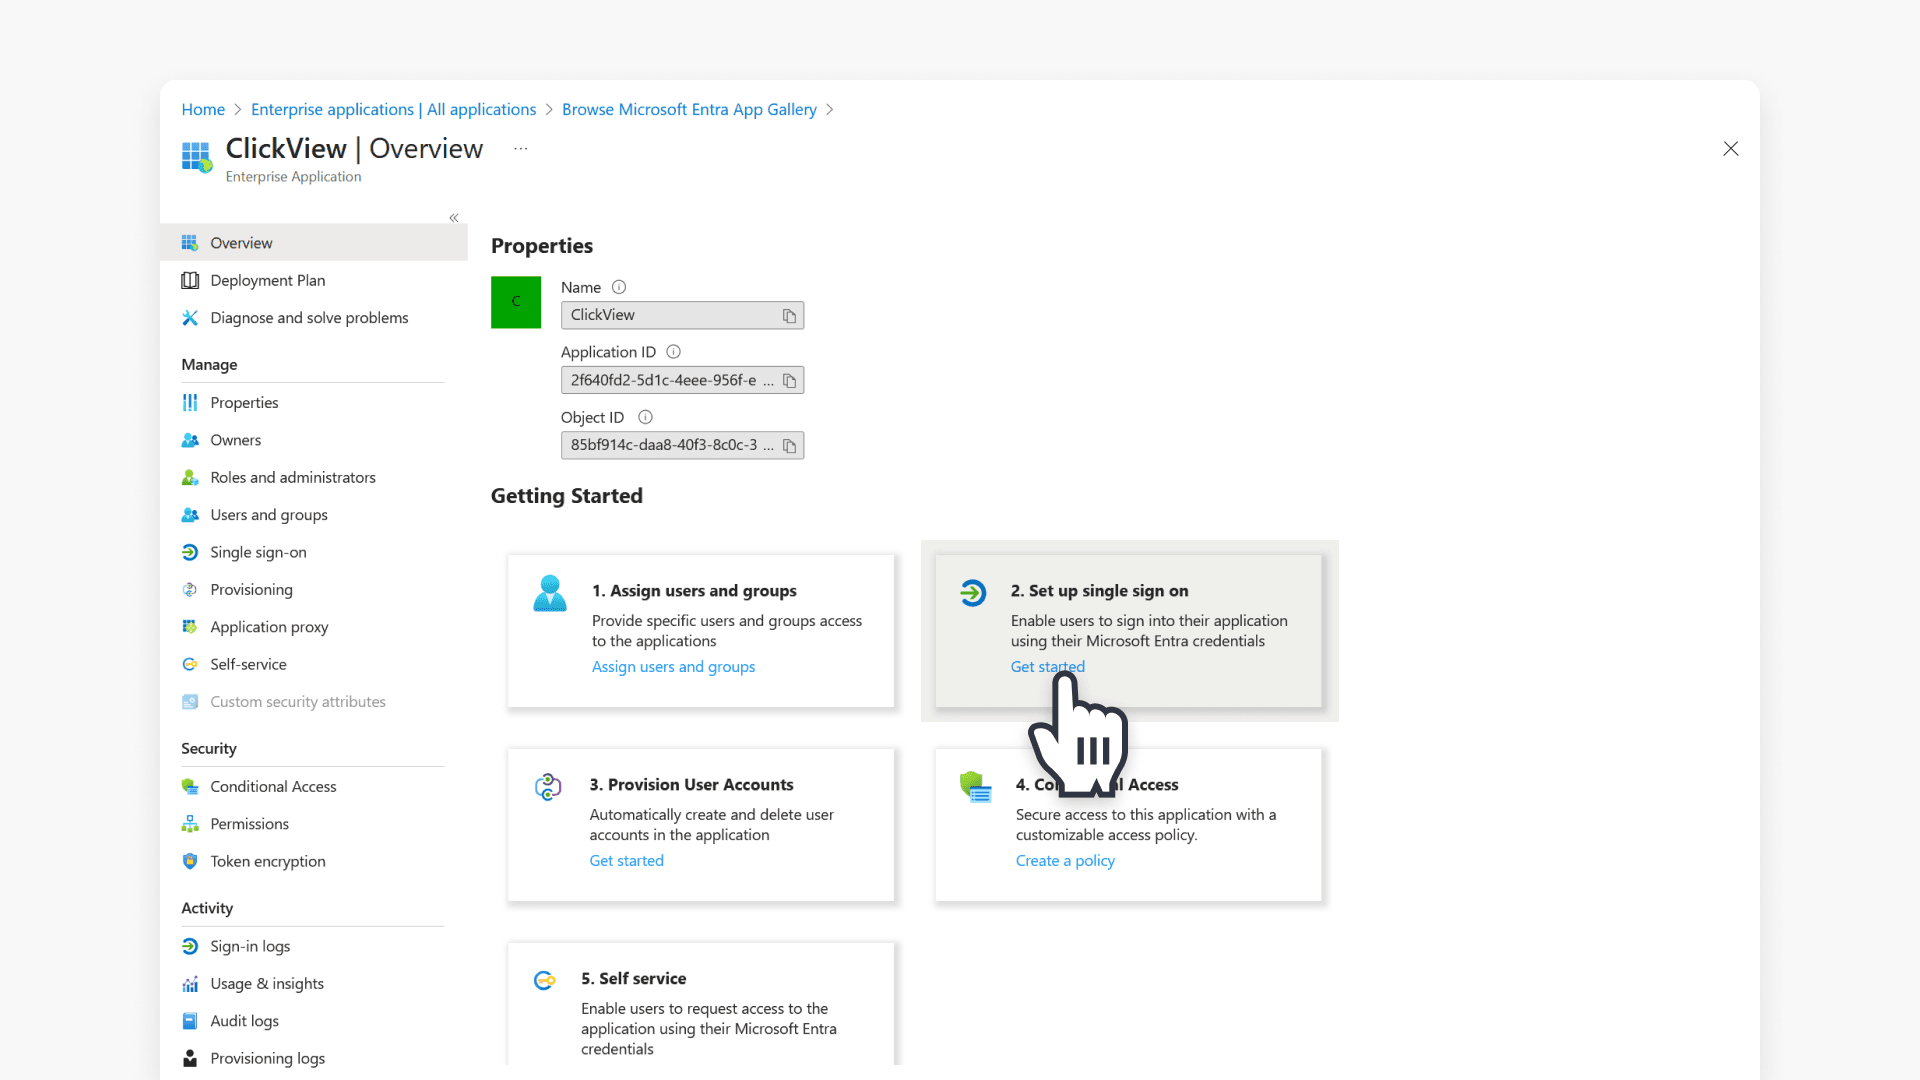
- Under the application’s menu, choose Single sign-on.
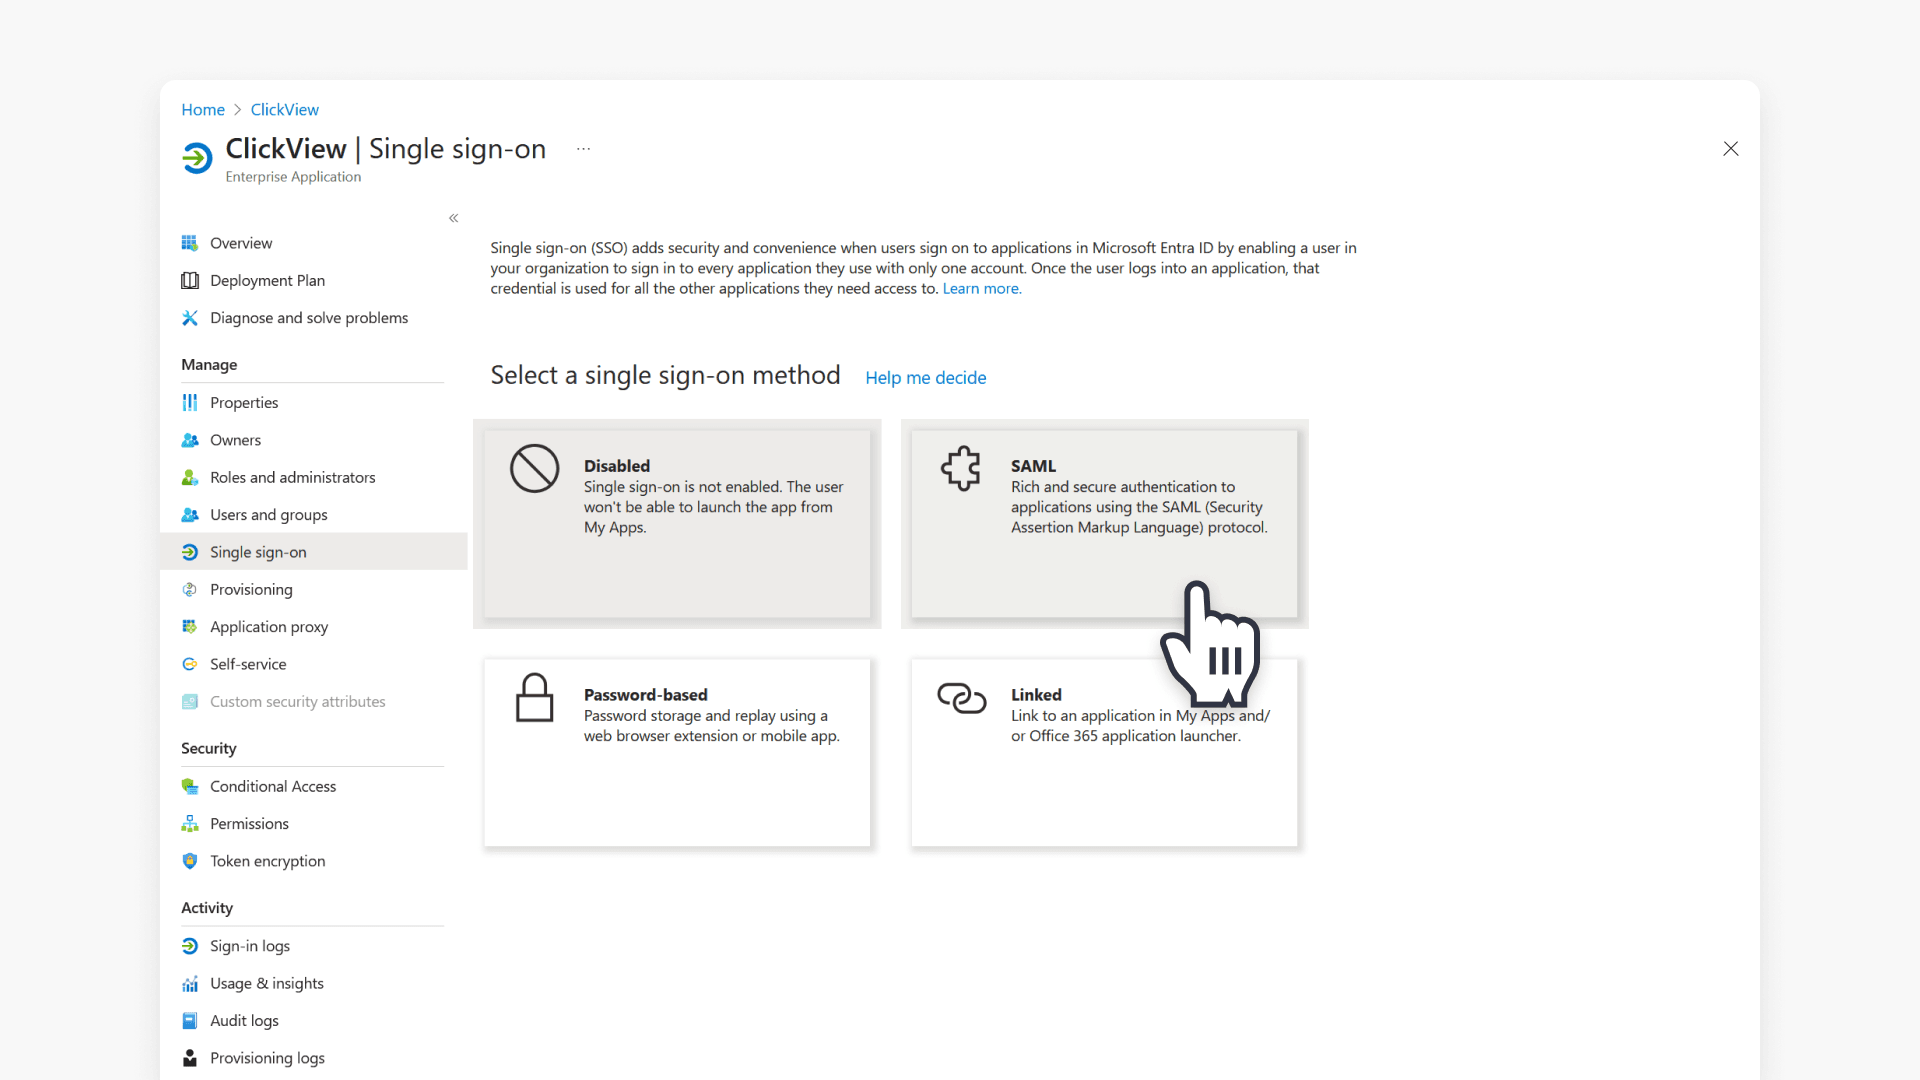
- Then click the SAML tile.
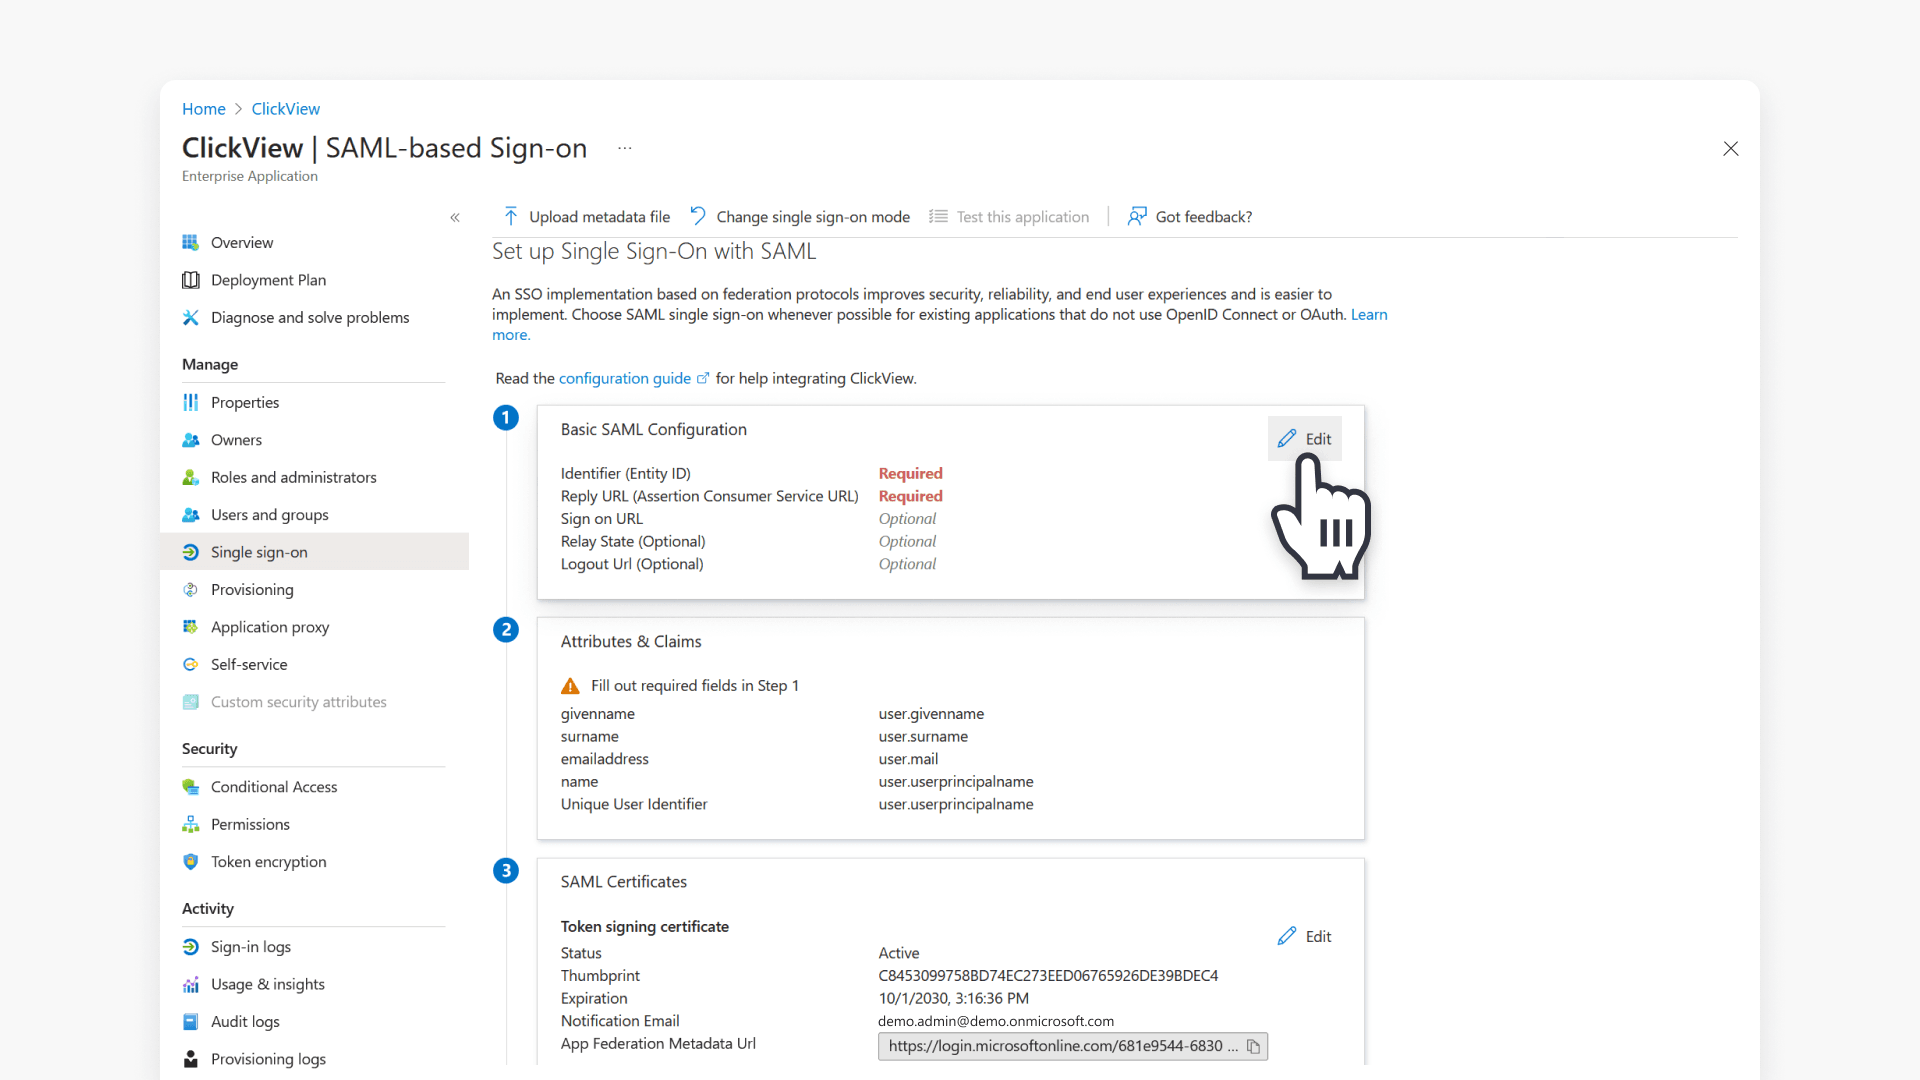
- In the Basic SAML Configuration tile, click ‘Edit’.
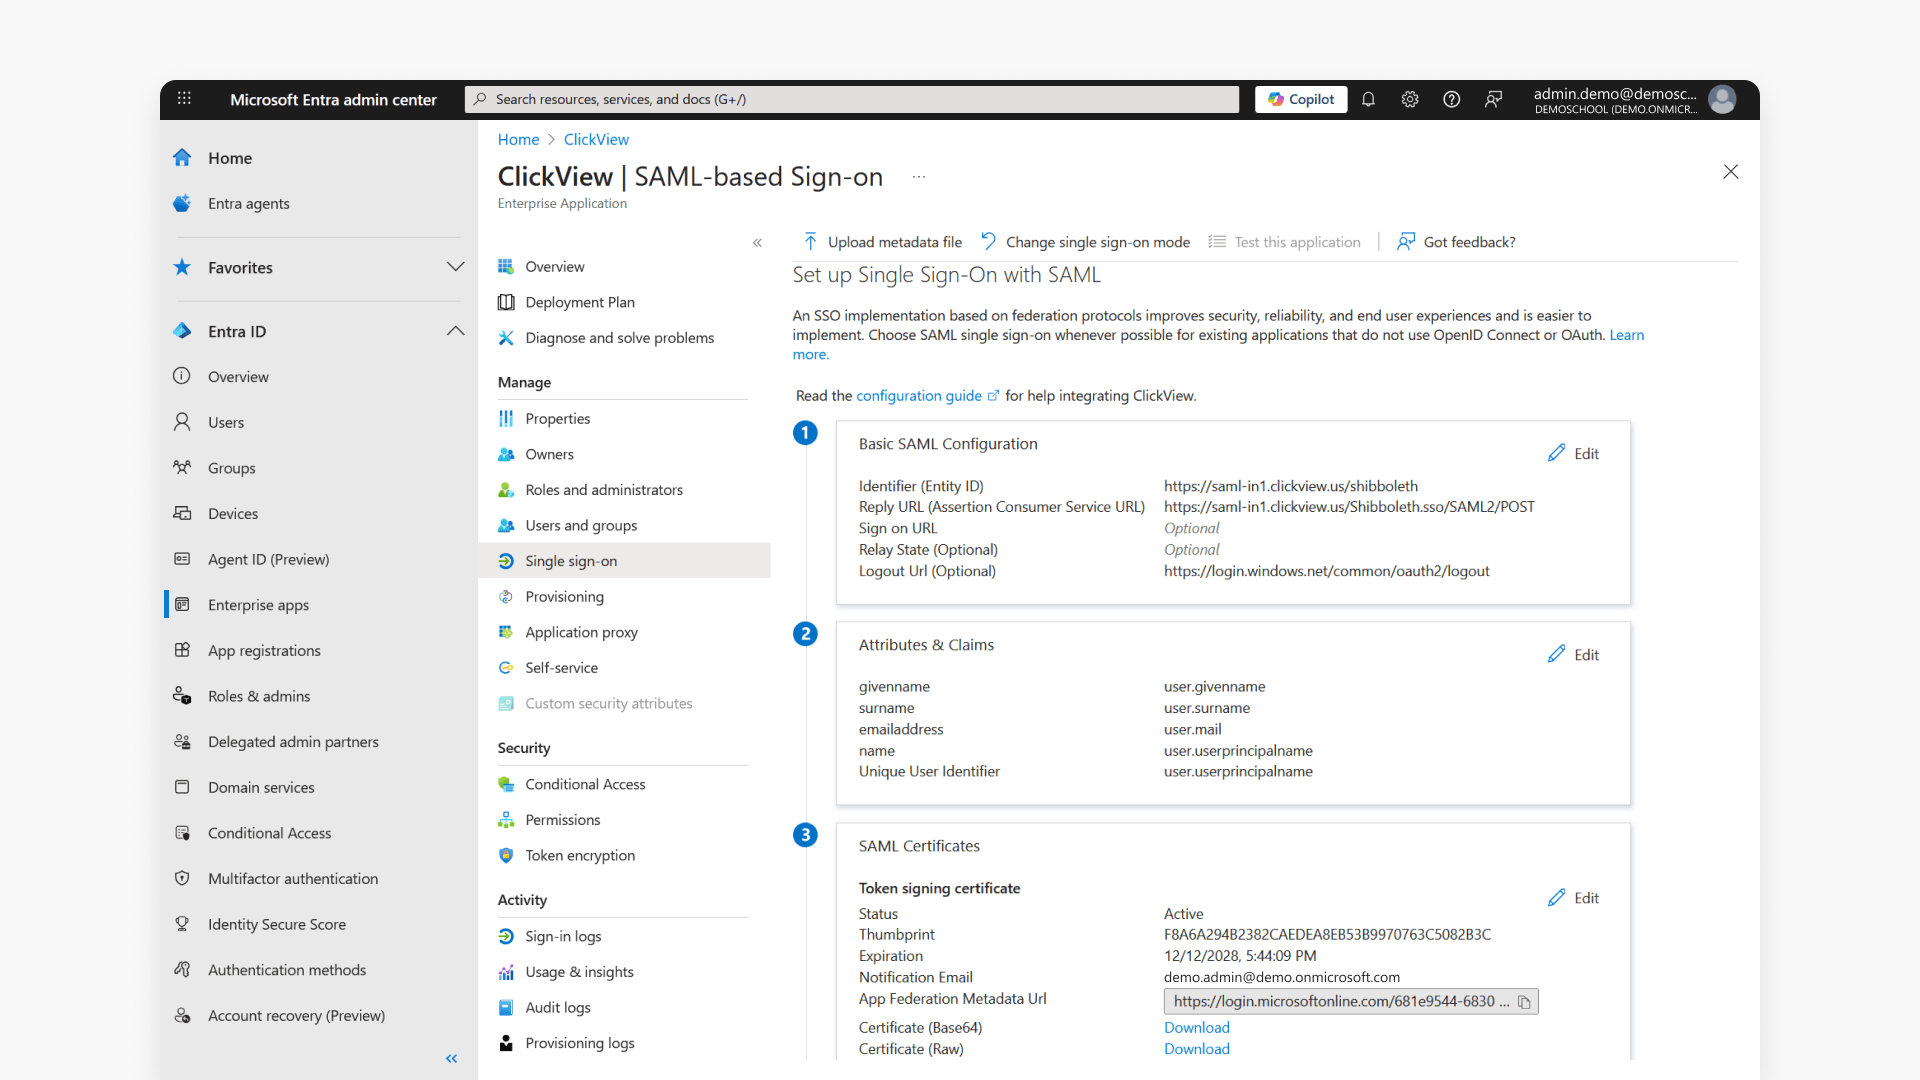
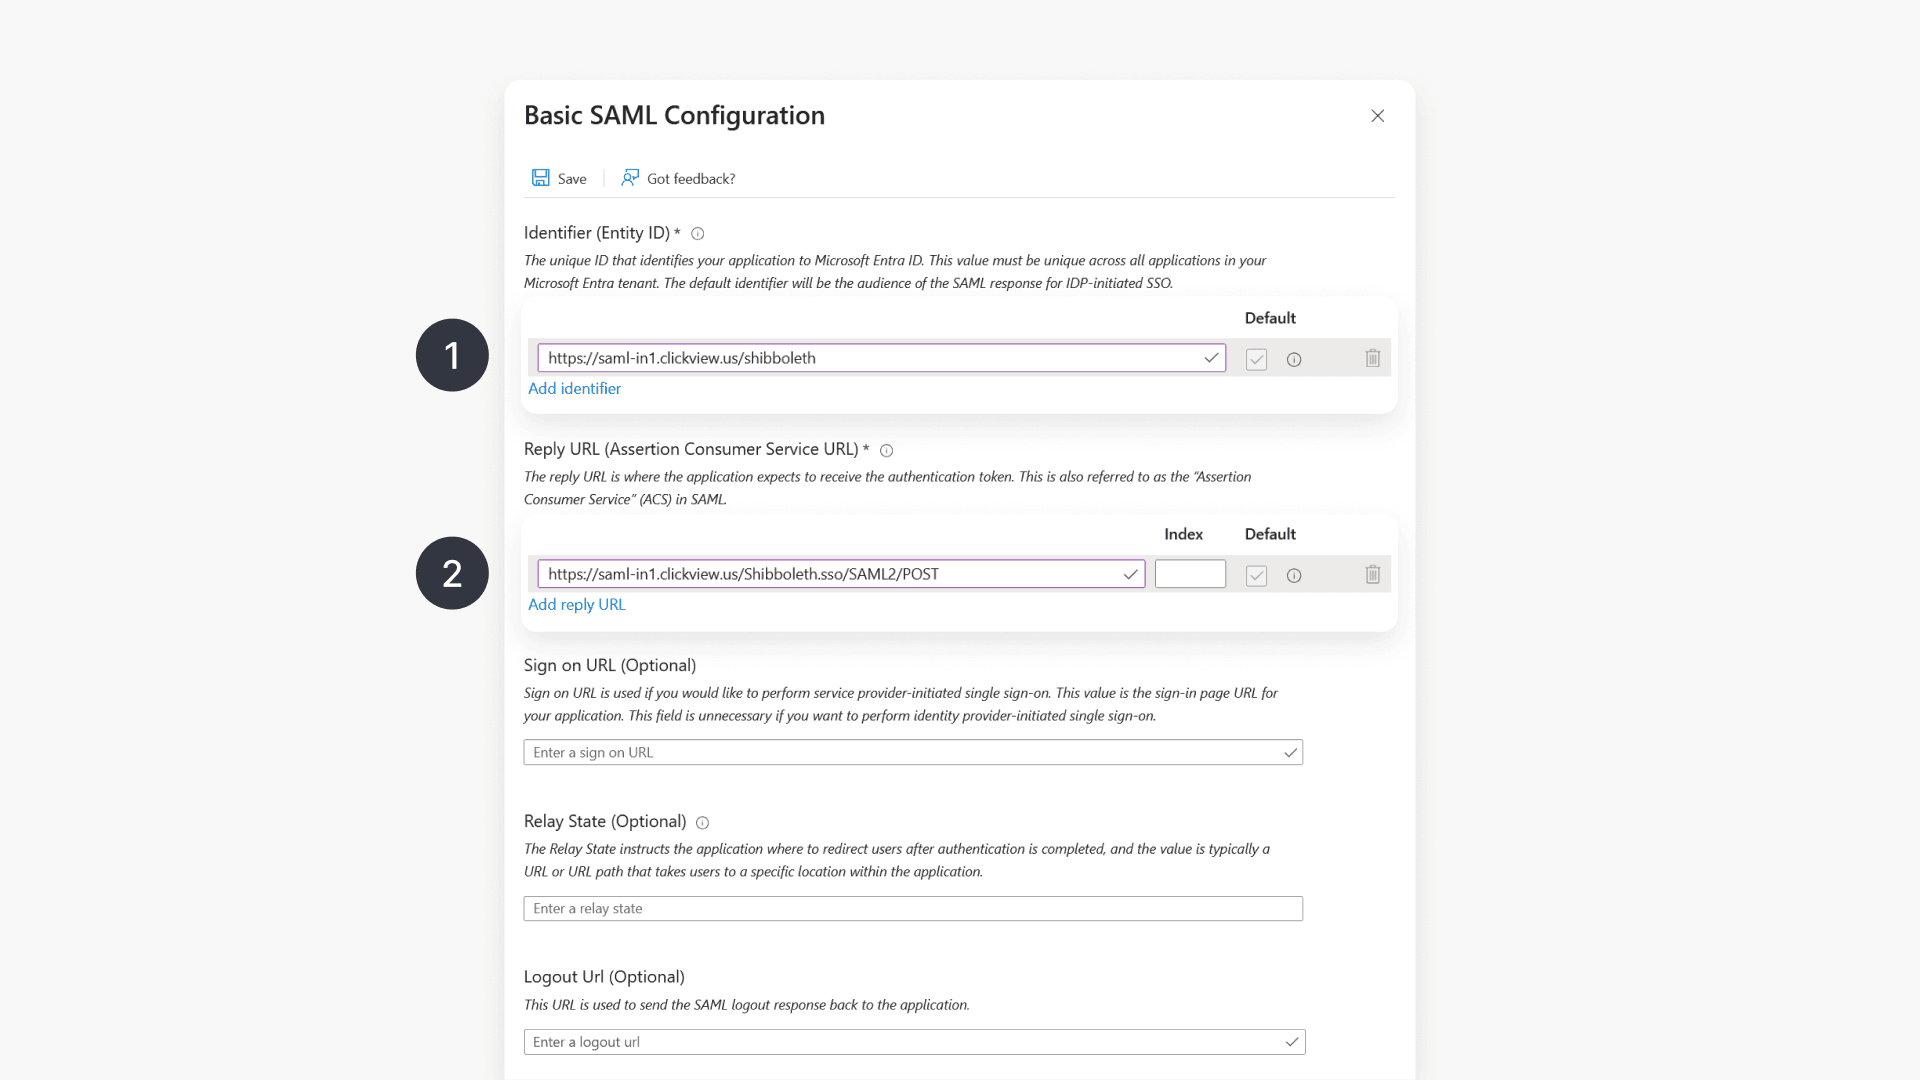
Setup basic SAML configuration
In the Basic SAML Configuration window, enter the following region-specific values:
- Identifier: https://saml-in1.clickview.us/shibboleth
- Reply URL: https://saml-in1.clickview.us/Shibboleth.sso/SAML2/POST
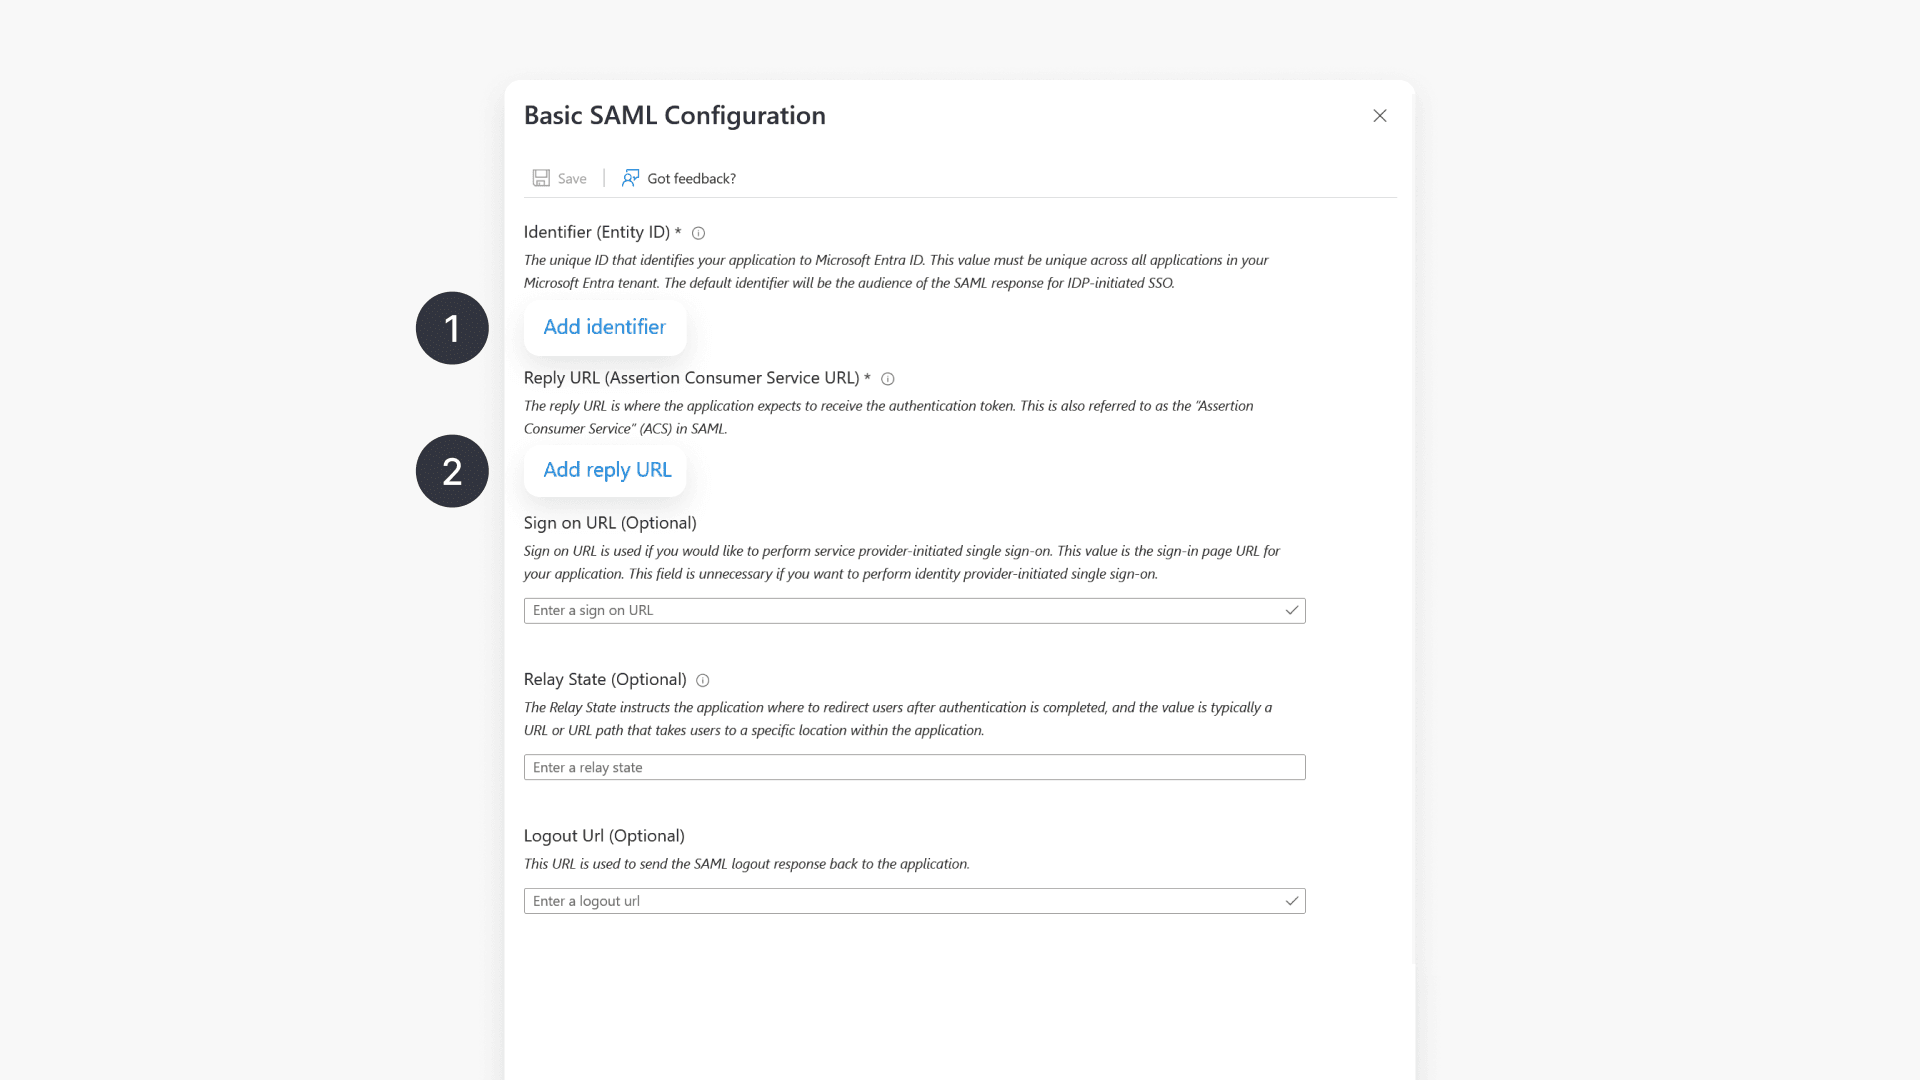
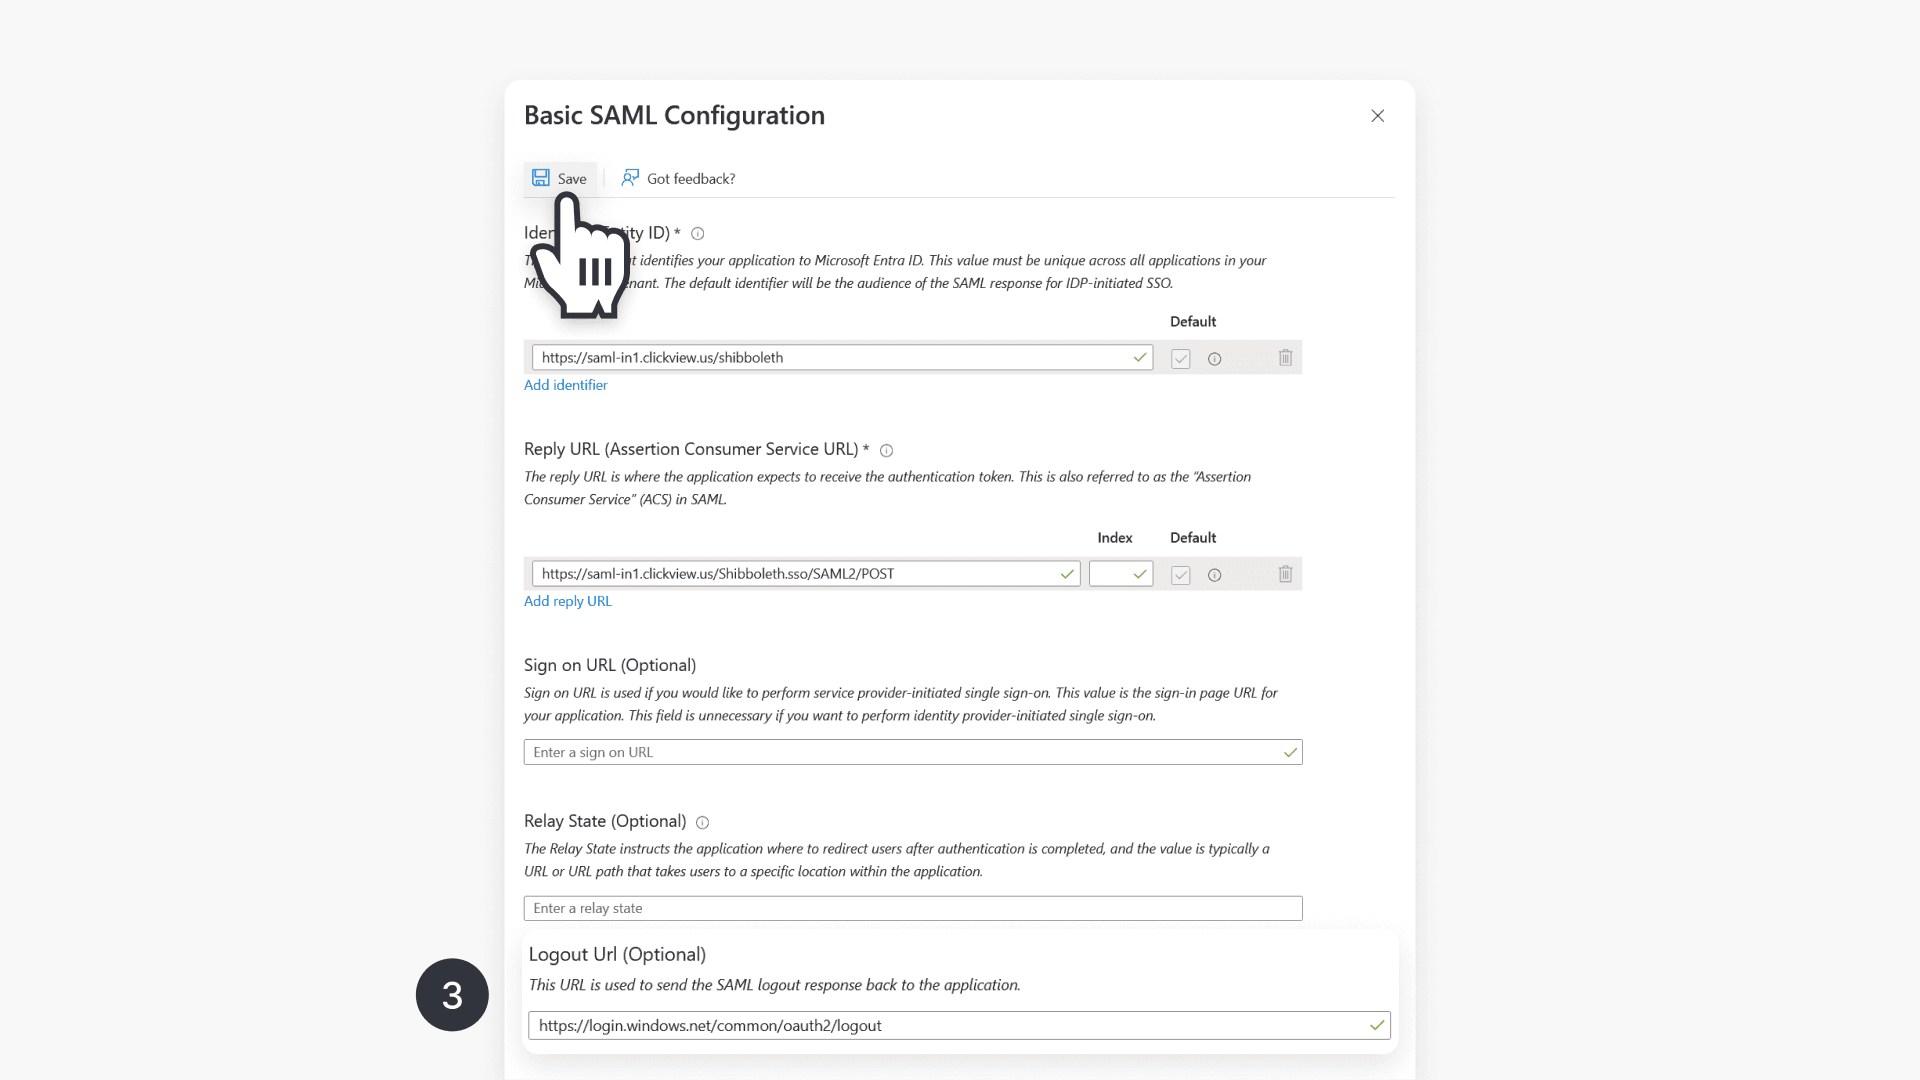
- Logout URL (default for all regions): https://login.windows.net/common/oauth2/logout
- Leave Sign on URL blank. This is optional and will be provided to you after onboarding.
Set user attributes and claims
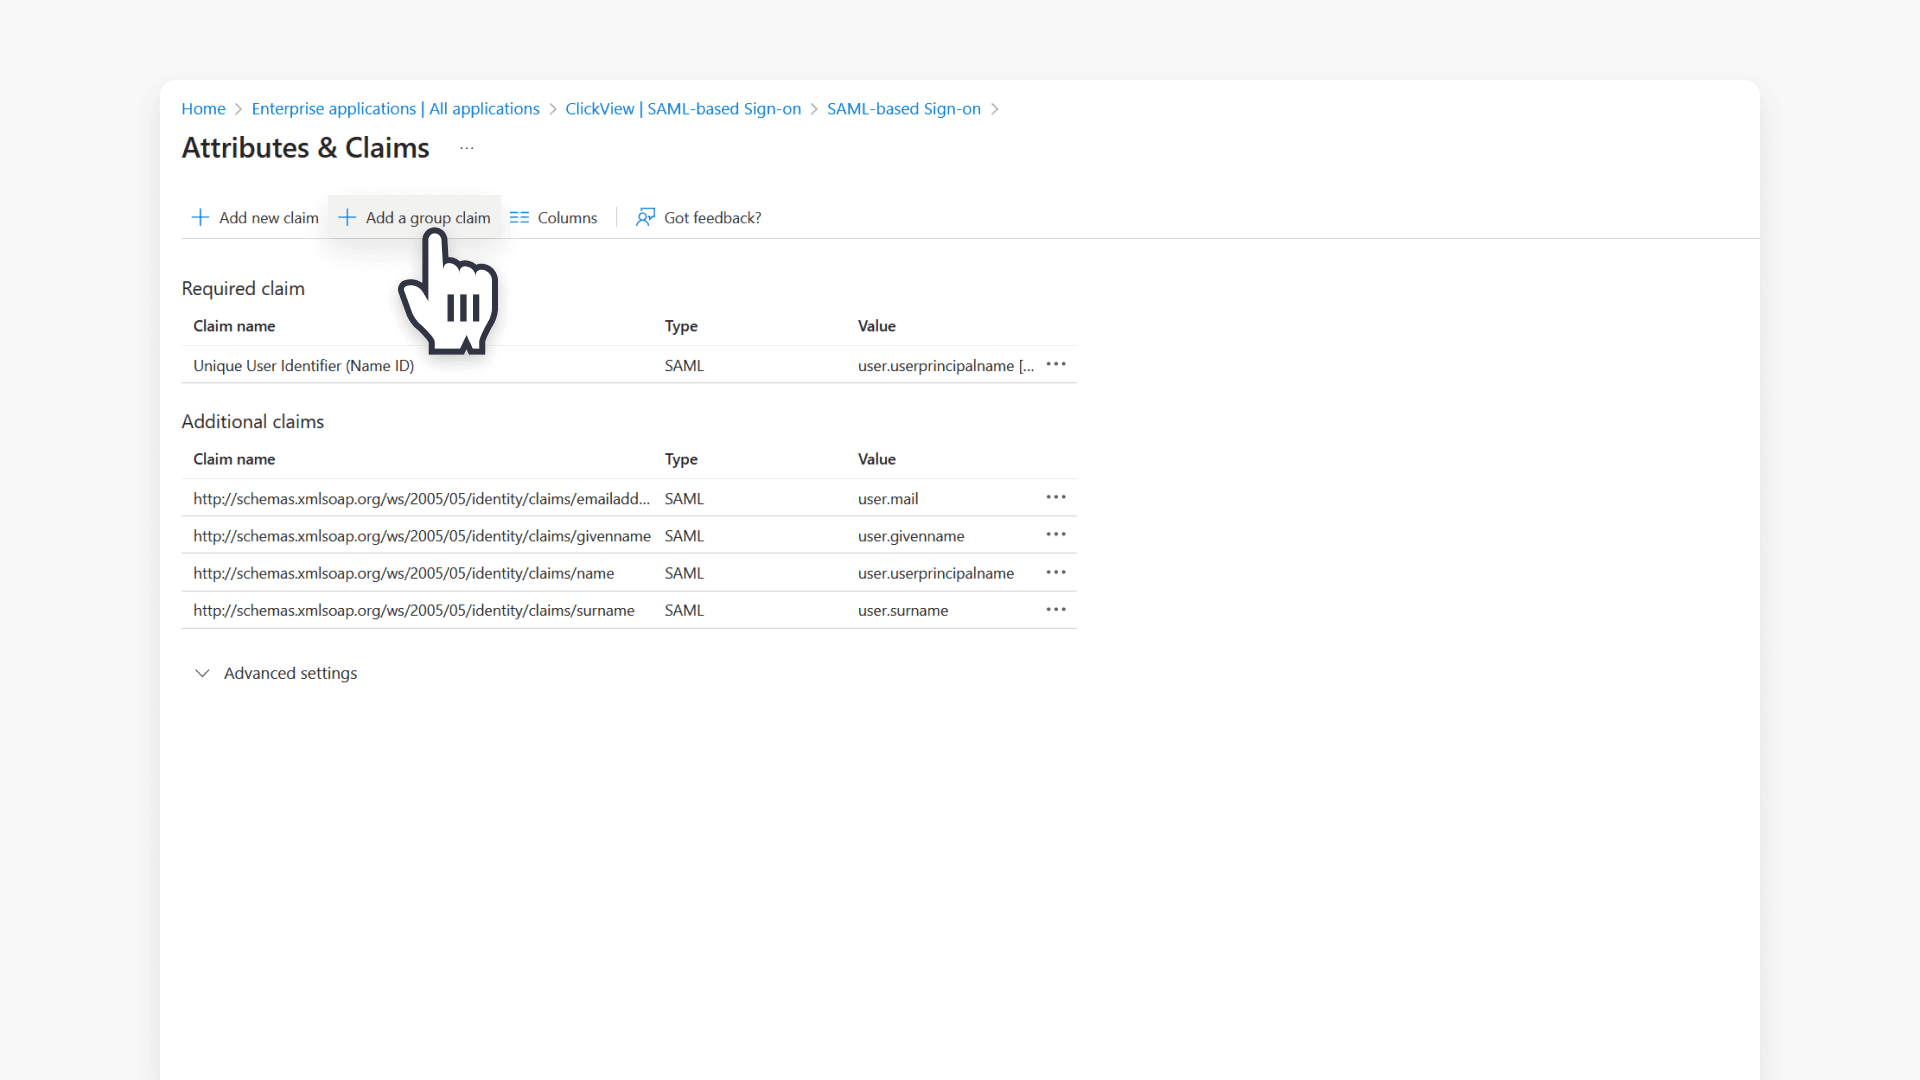
- Go to the Attributes & Claims tile and click ‘Edit’.
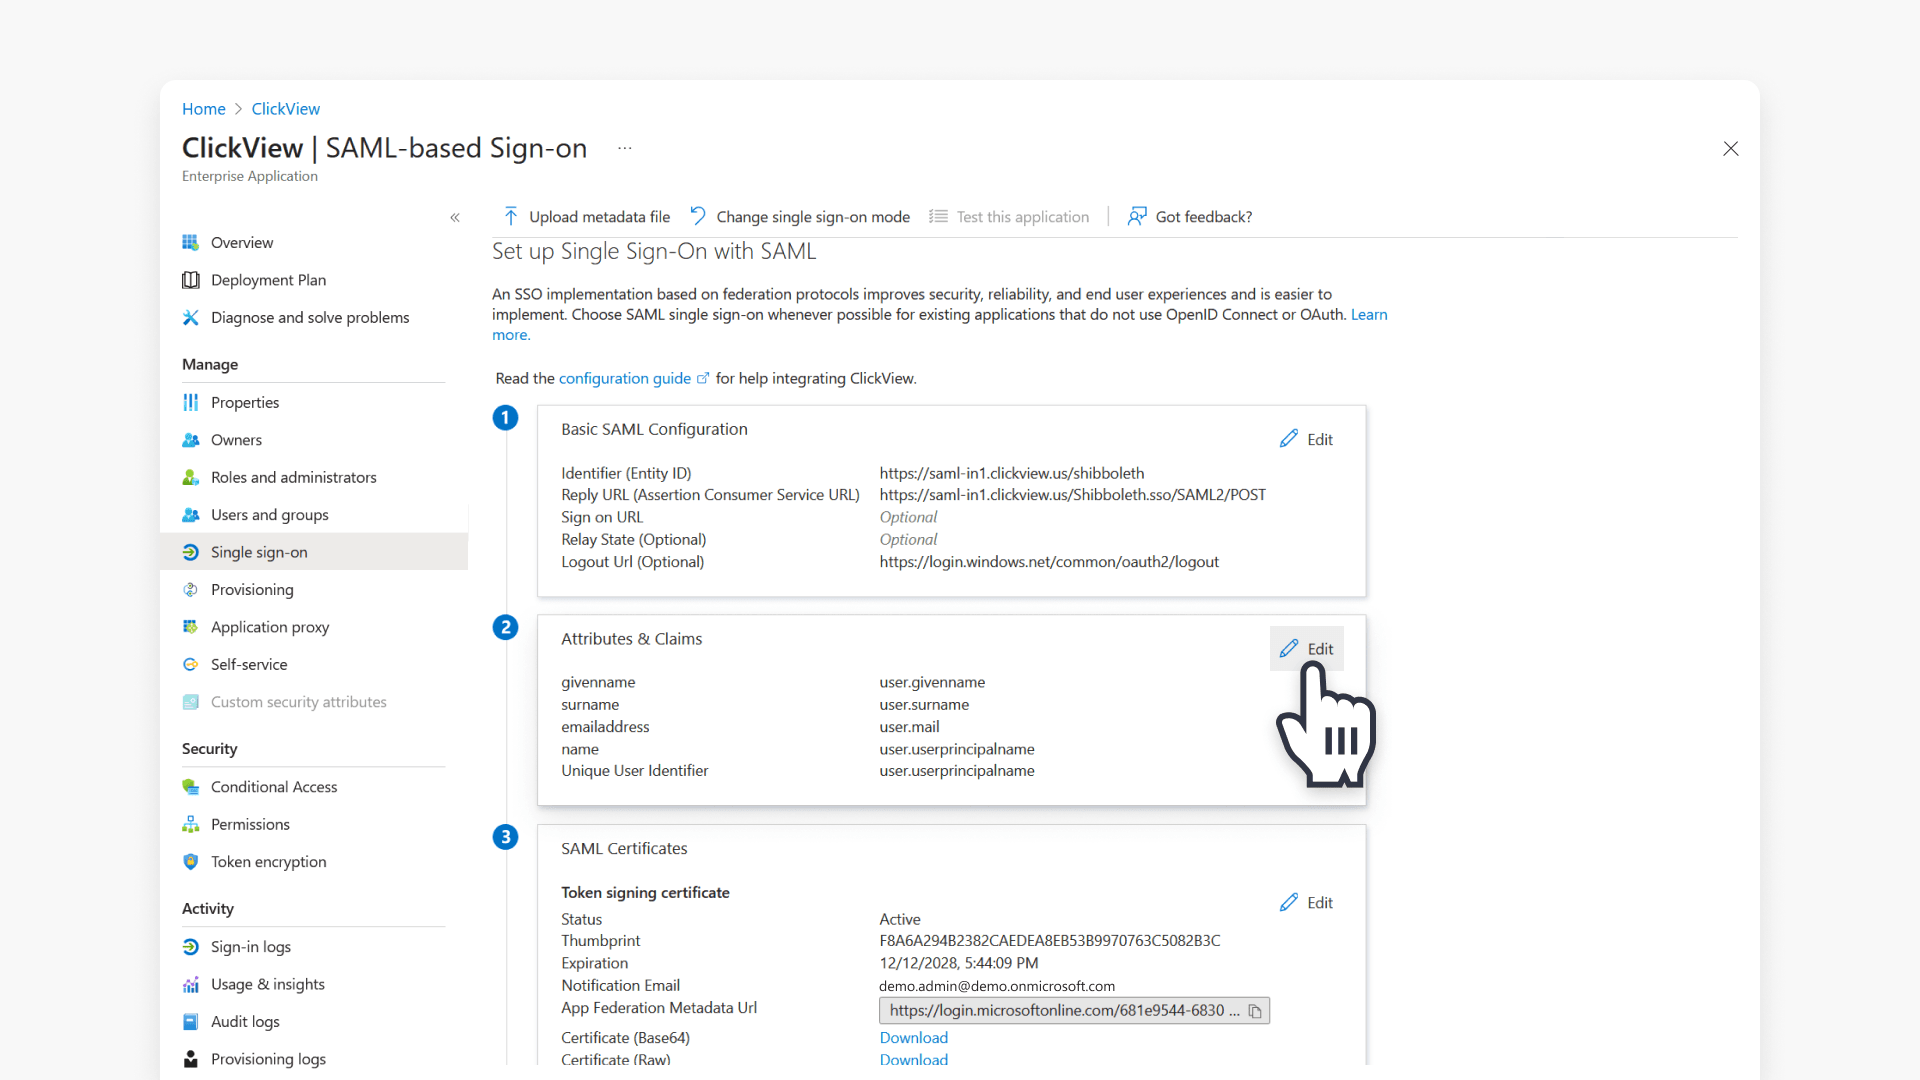
- The following attributes will be displayed by default:
- givenname
- surname
- emailaddress
- name
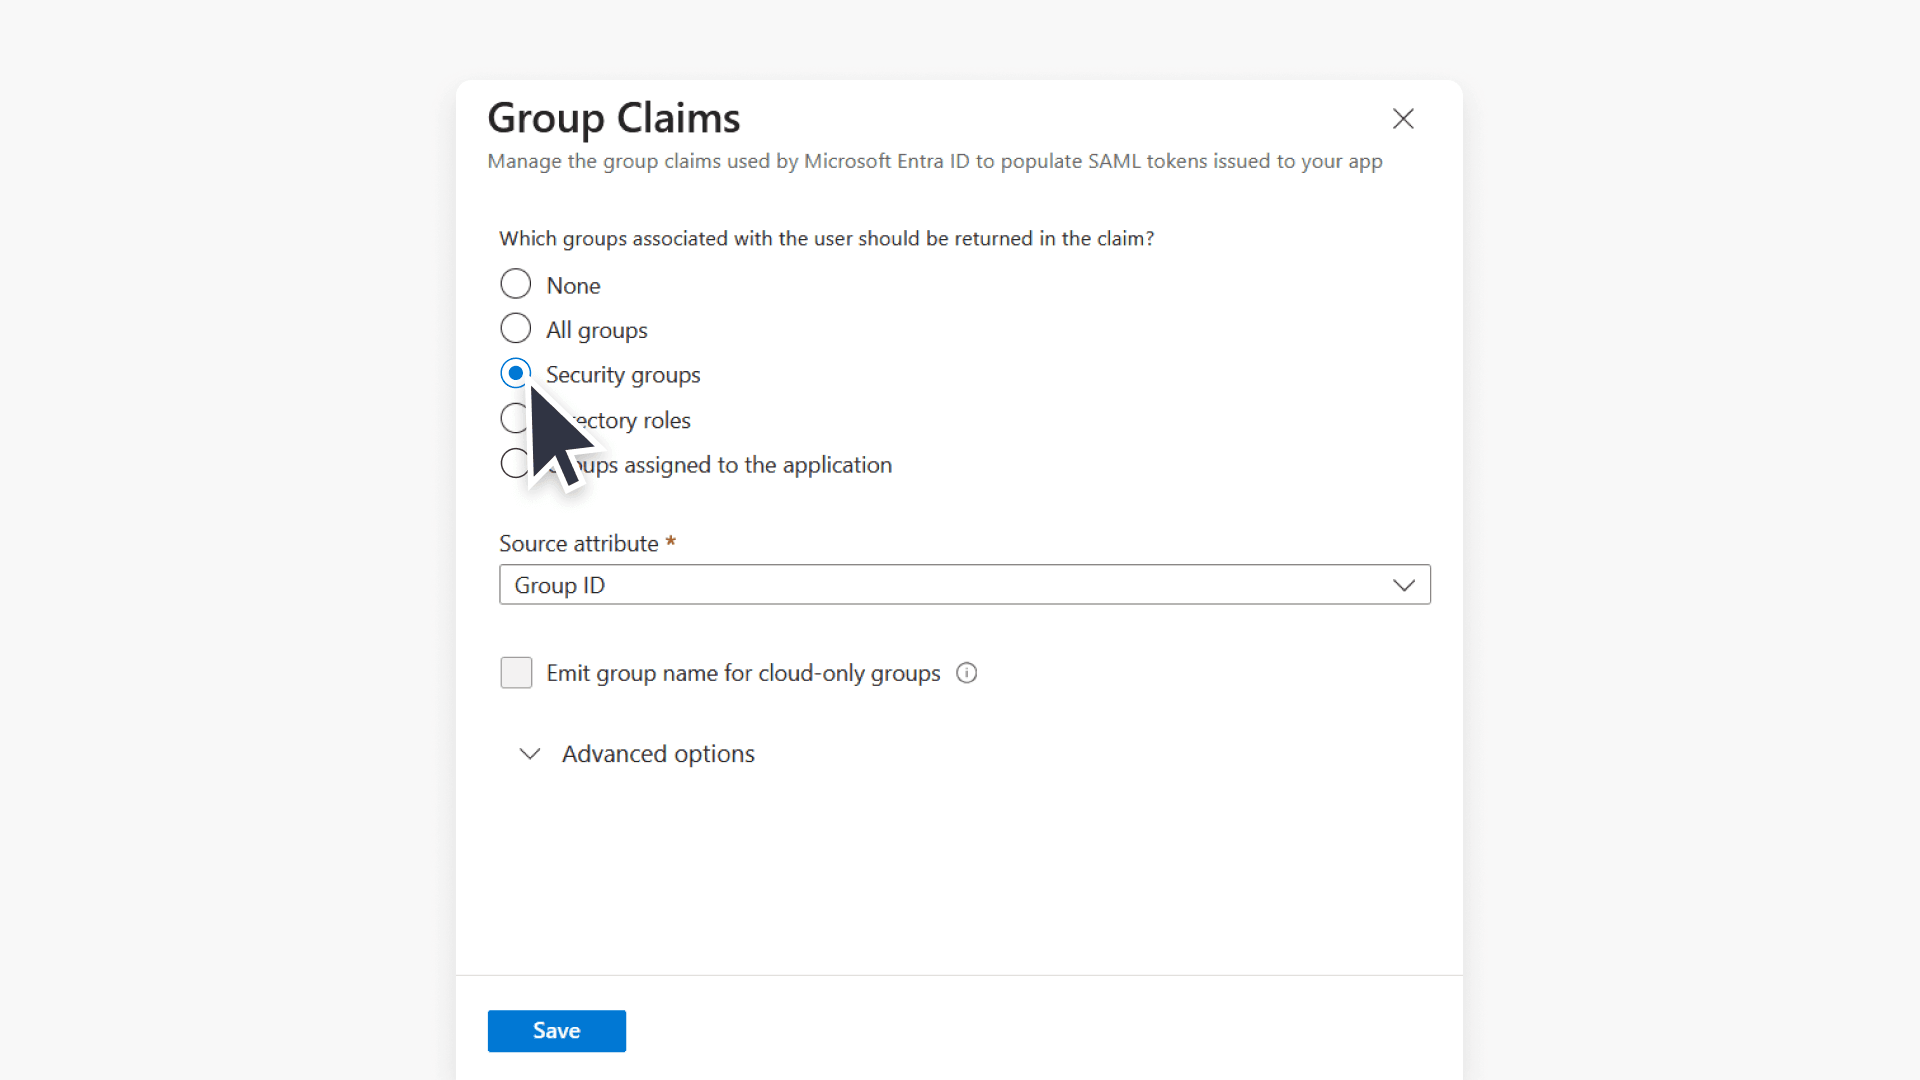
- To add a group claim, click + Add a group claim.
- Select Security groups and the appropriate Source attribute, then click Save.
- To add additional claims, click + Add new claim.
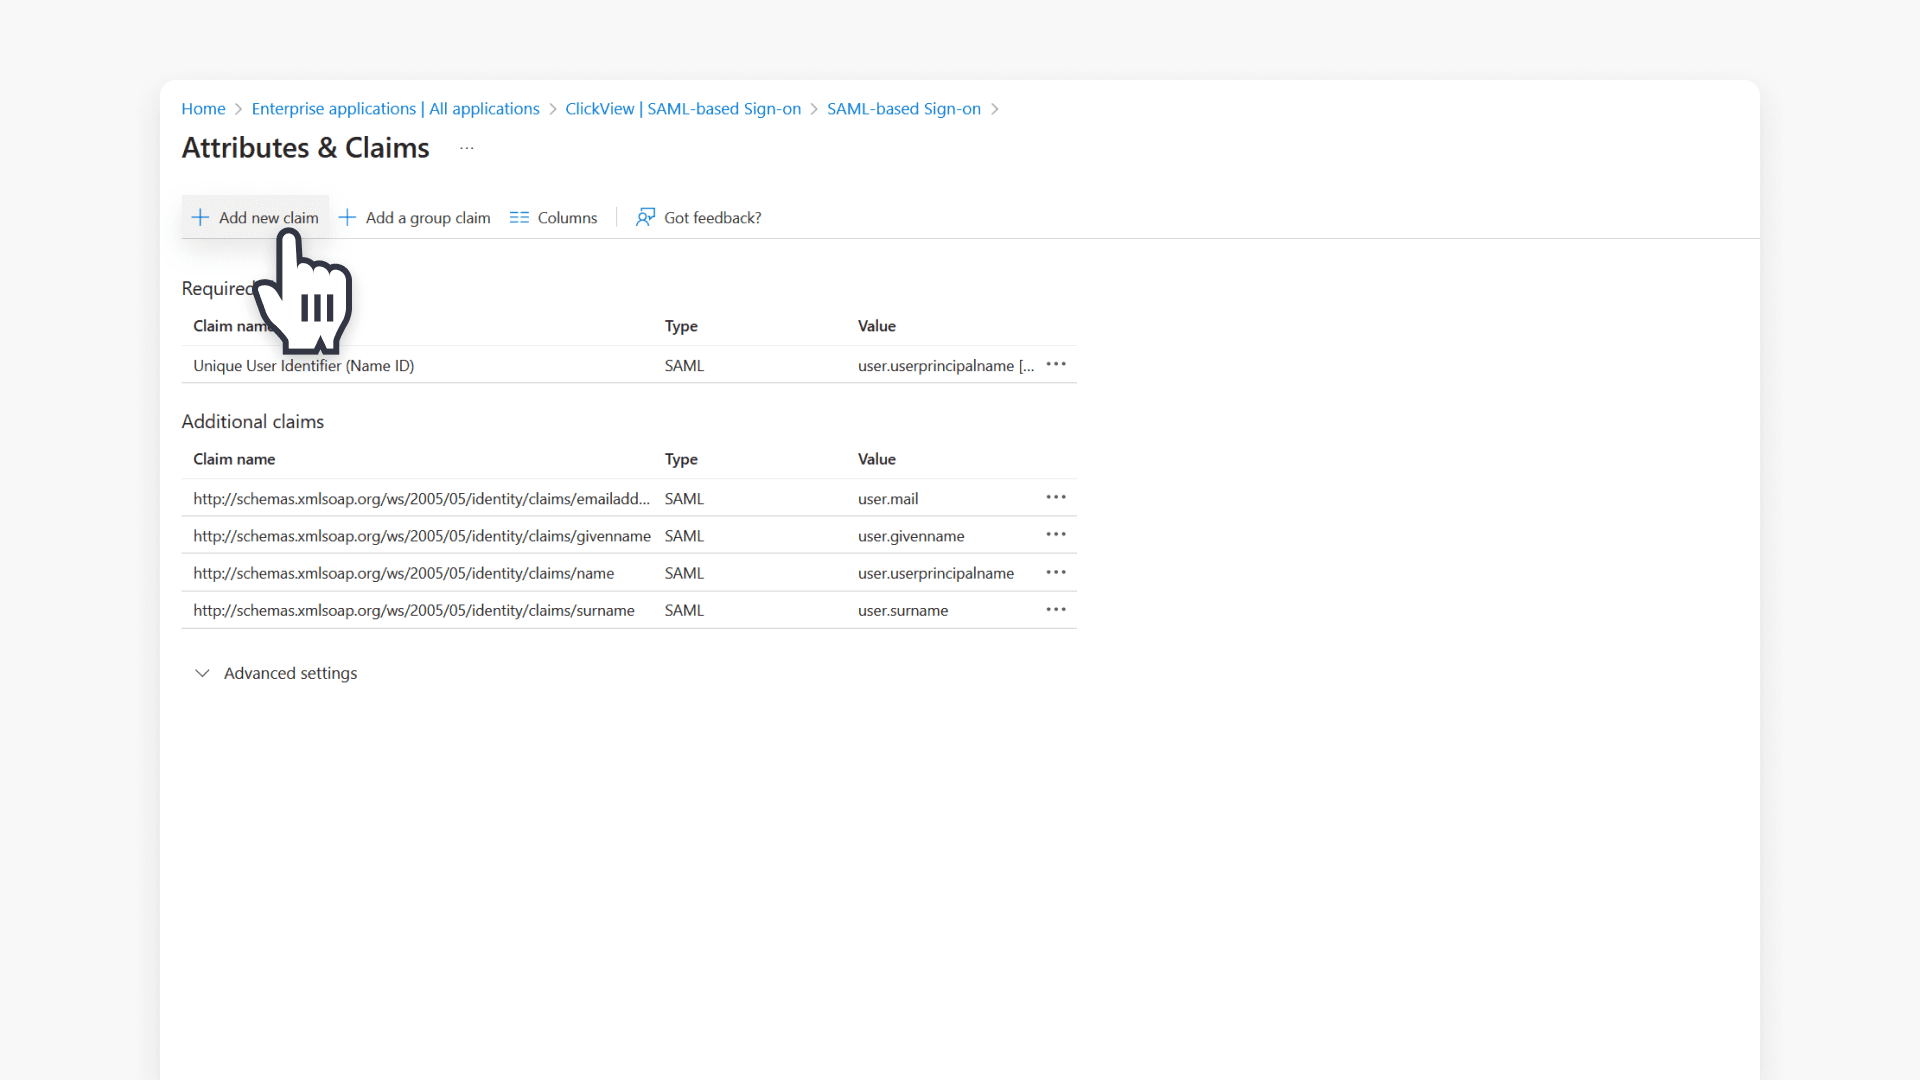
- Select the source Attribute and provide a Name, then click Save.
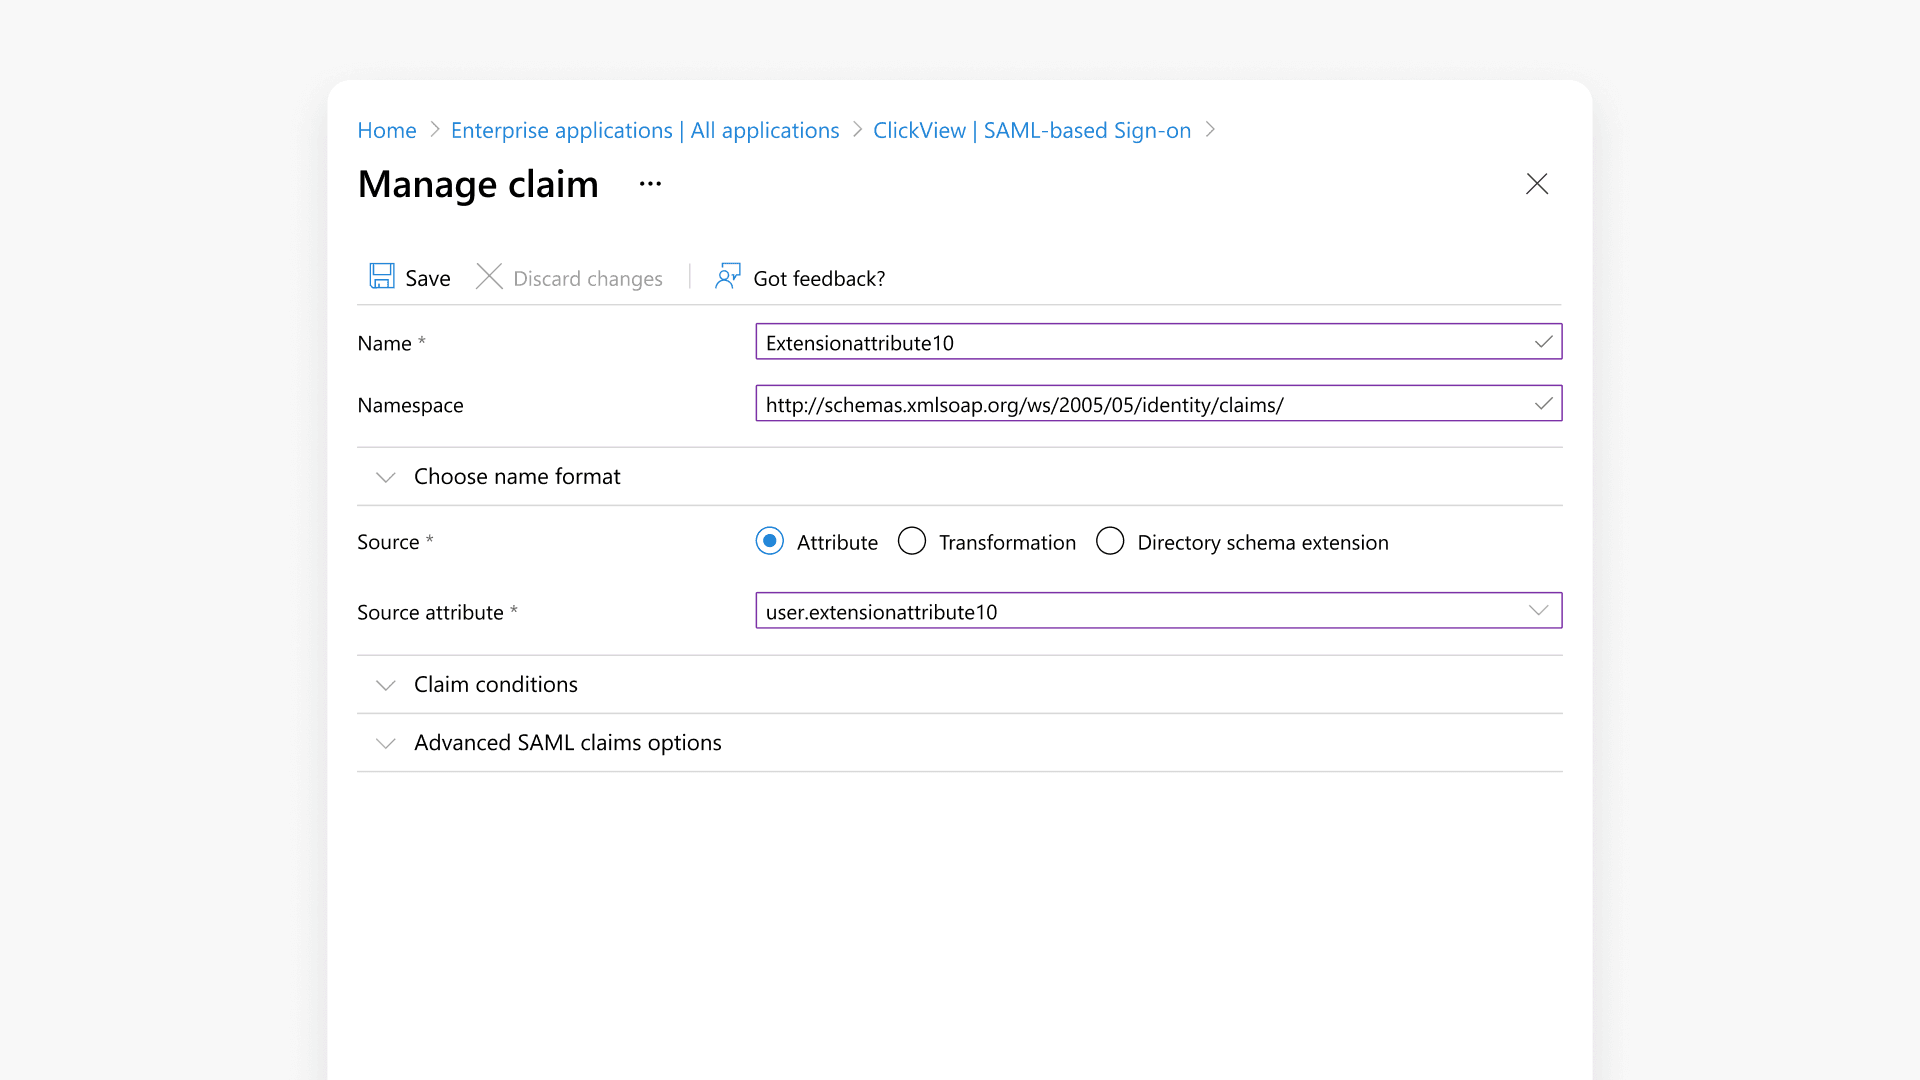
- You may configure attributes to identify grade levels for students, campuses, or distinguish staff/admin users.
Complete SSO onboarding with ClickView
This is the final step of the setup process. To complete this, please provide ClickView Product Support with:
- Your App Federation Metadata URL.
- A list of all staff and student security groups
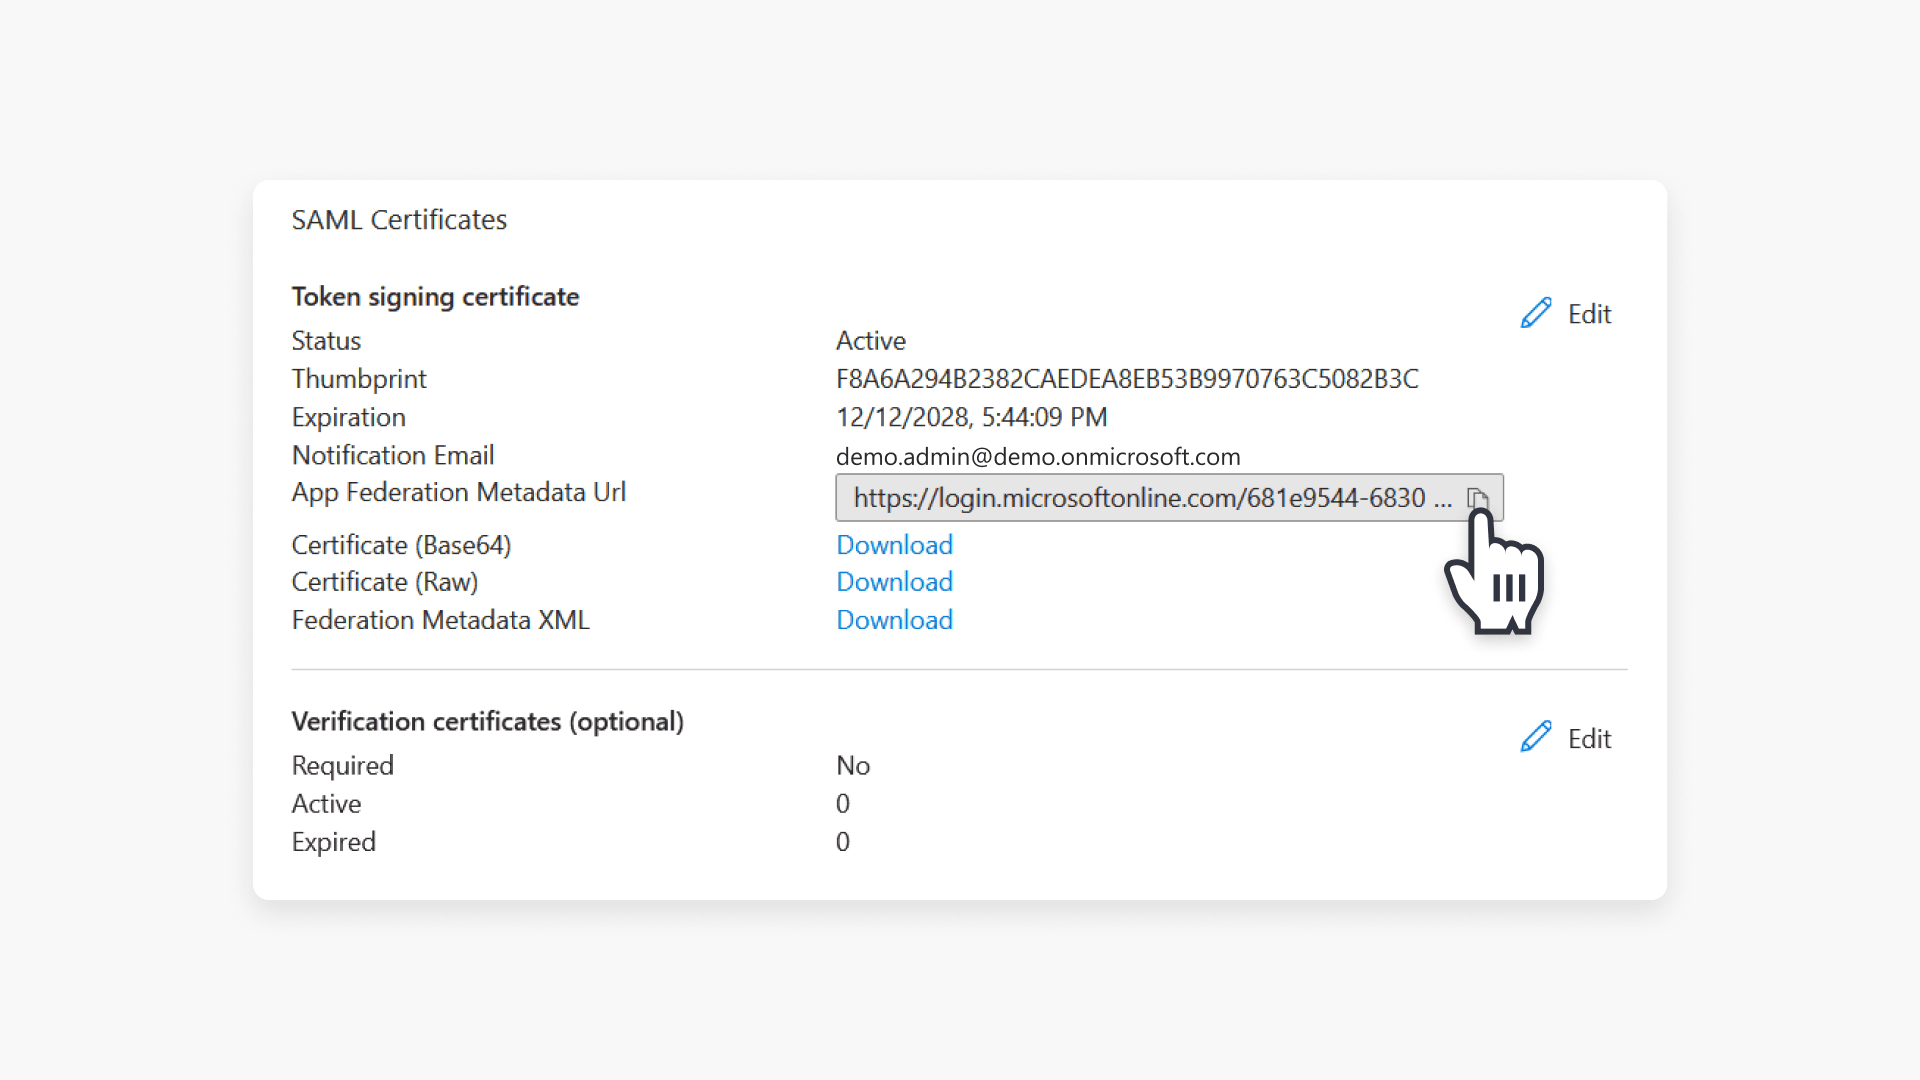
App Federation Metadata URL
To obtain your App Federation Metadata URL, follow these steps:
- Select Single sign-on then go to the SAML Certificates tile to locate App Federation Metadata Url.
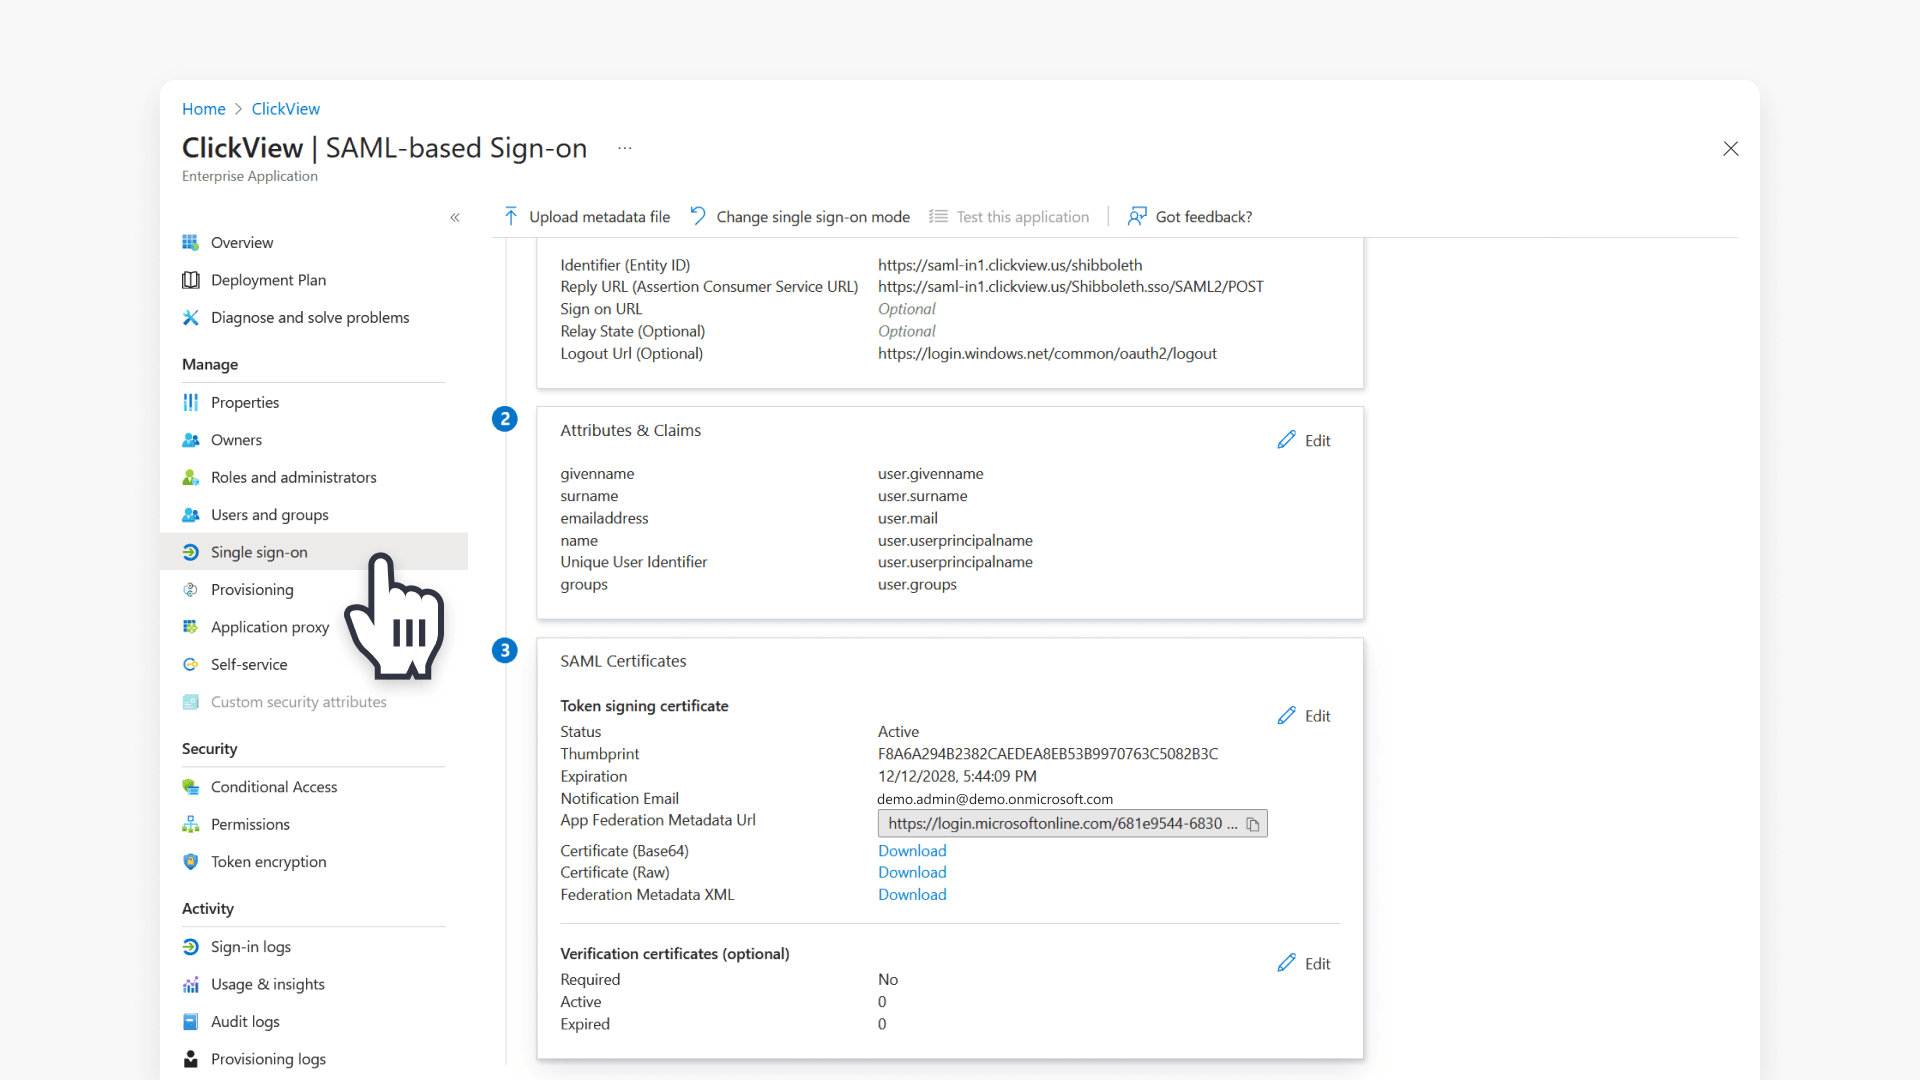
- Click the Copy icon to the right to copy the URL to your clipboard.
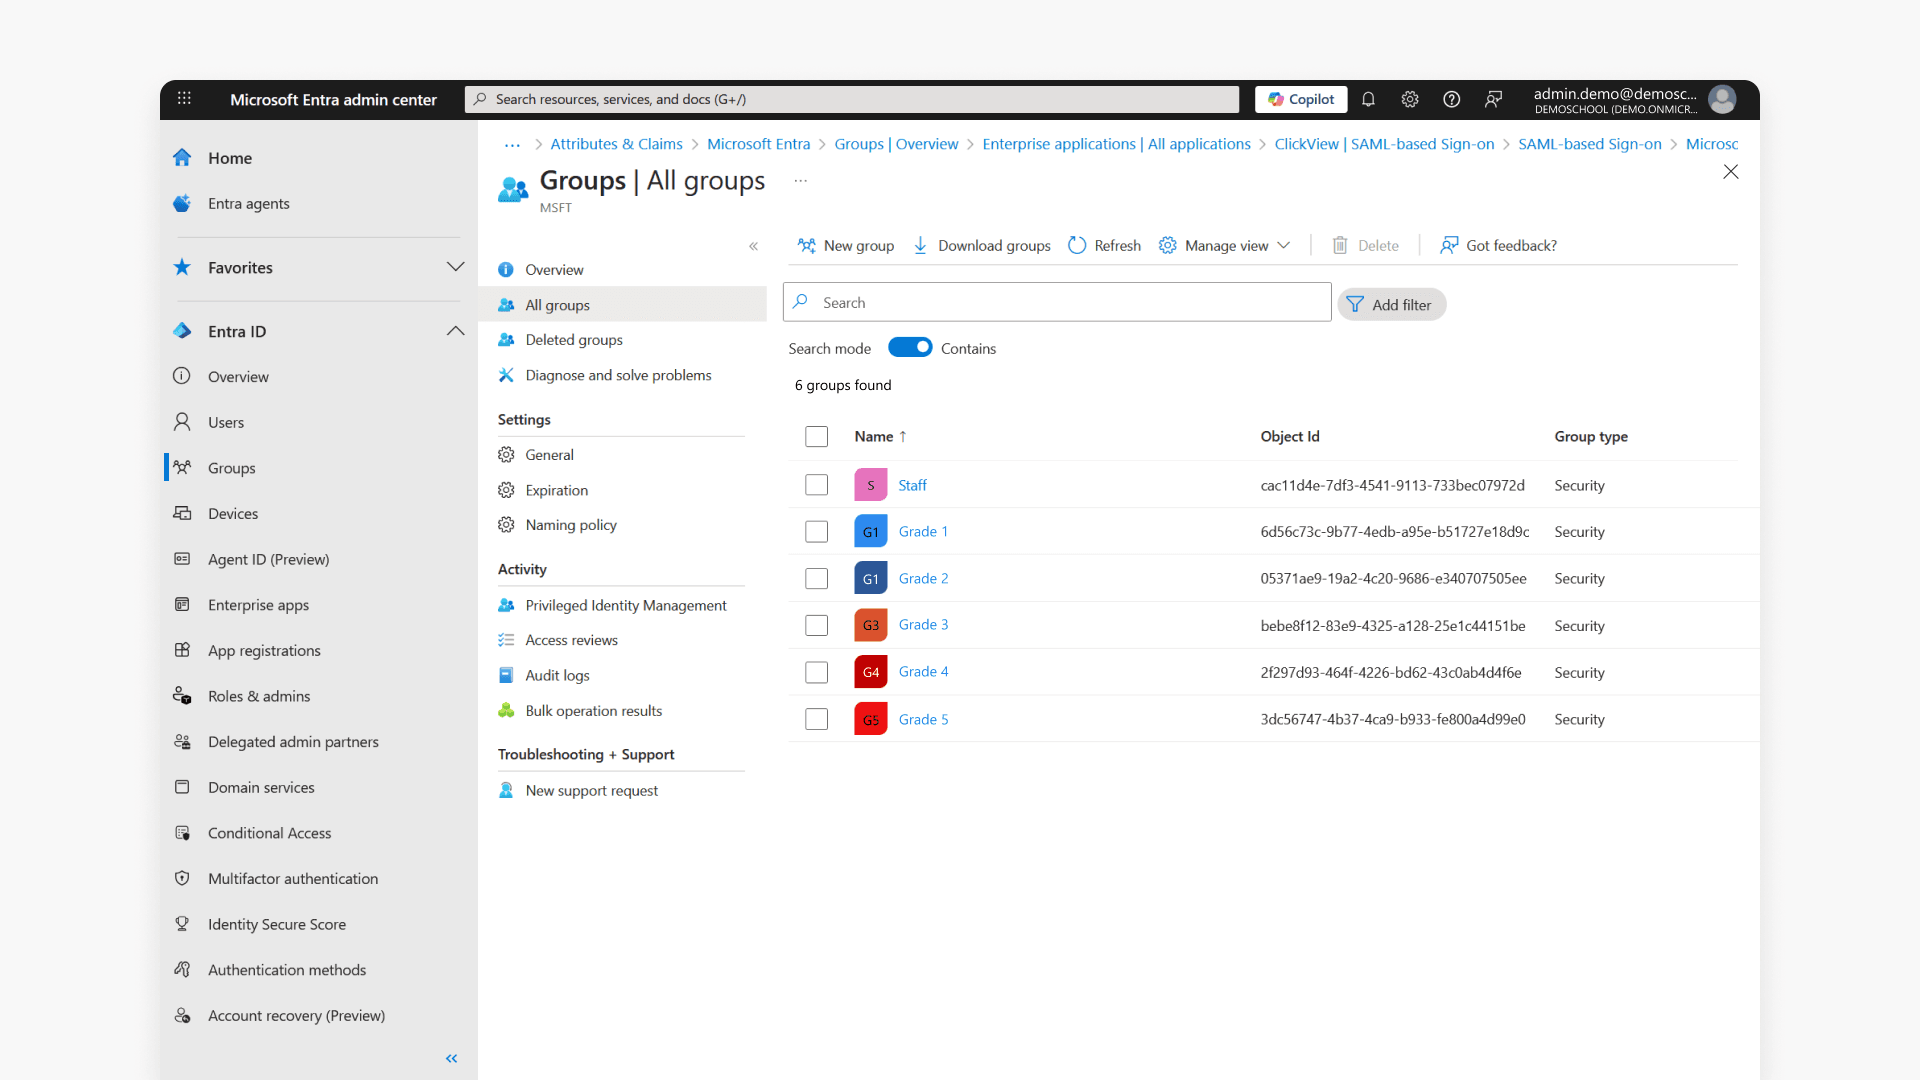
Staff and student security groups
This is required to ensure your school’s grade levels are mapped correctly in ClickView.
- In the Microsoft Entra admin center, go to Groups.
- Click on All groups and search for relevant groups.
Important points to note
- If you use local Active Directory groups, synchronize with Microsoft Entra Connect Sync.
- For SAML group claims setup, see Add group claims to tokens for SAML applications using SSO configuration.
- Group claim SAML token limit: Microsoft Entra supports up to 150 user groups. If exceeded, ClickView cannot retrieve groups via API. Limit group assignments or send only security groups as needed.
- Provide test student and staff account credentials with all required attributes and group memberships for SSO testing.
Start your onboarding process
Once you you have completed the above, please start your onboarding process by completing this form.
Frequently asked questions
Get in touch
If you’re having trouble finding the right topics or videos, just reach out! Our team - 

 Akhil, Daniel, Jalaj, or any of us at ClickView - will be happy to help you get sorted.
Give feedback
Was this guide helpful?
Up Next

How to set up Okta SAML SSO with ClickView
This article explains how to configure a SAML 2.0 application in Okta for use with ClickView and submit the required metadata so the SSO instance can be set up.