How to teach phonics with sound buttons
In this guide
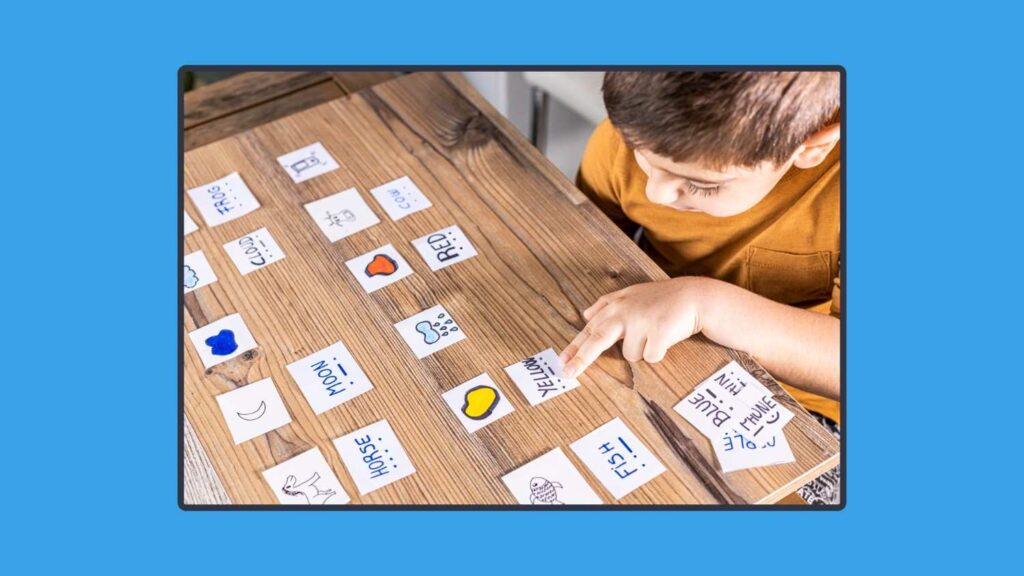
Sound buttons are essentially dots and dashes that are positioned underneath words to help emergent readers to decode new or unfamiliar words. The sound buttons help the learner to segment the word into smaller sounds, and then blend the sounds together to read the word!
Essentially, if a single letter makes a sound in a word, it will be represented by a dot, usually written underneath the letter. If there are two letters that together make one sound, known as a digraph, then this is represented by a dash, underneath the two letters. So the word ‘ship’ would be written with a dash underneath the ‘sh’ and dots underneath the ‘i’ and the ‘p’.
A split digraph is where the two letters work together to make one sound, but they are split apart with another letter in between them. This used to be known in a lot of places as the ‘magic e!’ The sound button for this is a curving line that connects the two letters together. So the sound buttons for the word ‘rake’ would be dots underneath the ‘r’ and the ‘k’, and a curving line to connect the ‘a’ and ‘e.’
I have used a variety of phonics schemes, and some represent a split digraph with the curved line above the letters, some choose to place the curved line below!
Some words have three letters that blend together to make one sound, and this is known as a trigraph. Similarly to the digraph, that is represented as a dash under the corresponding letters, this time underneath all three letters that go together to make one sound. So the word ‘high’ would have a dot under the ‘h’ and then a long dash underneath the ‘igh.’

Sound buttons can be really helpful with teaching a lot of emergent readers, because instead of students having to recall what a whole word says, they can first learn the phonics sounds. This can reduce the cognitive load for learners, and can seem far less daunting than being presented with a whole word!
Additionally, sound buttons can help with phonics development because they help learners to spot patterns in words, making them easier to commit to memory. Some phonics programs have catchy rhymes for the different phonics sounds too, such as ‘ea’ which can be taught as ‘ea – cup of tea.’
Not only does this help a student to recall that sound, they are also concurrently learning a high frequency word along with the sound!
As a student becomes familiar with all of the phonics sounds as pure sounds, they can then be presented with simple words where the sounds are placed together with the sound buttons. The buttons help a student to know how to break down that word, and to identify whether or or not they are looking for more than one letter to make a sound.
By segmenting even the most simple of words, such as ‘cat’ into the phonetic sounds of ‘c’ ‘a’ and ‘t’ with the aid of the sound buttons, students can then blend those sounds together, and read the word!
As words become more complex, with more letters placed together, the sound buttons continue to aid that student in knowing which letters should be read together, and which ones make their own sound in the word. So the word ‘shake’ can be segmented into the phonemes (or sounds) ‘sh’ ‘a_e’ and ‘k’ and then blended back together to make the word.

The most effective way to teach phonics using sound buttons is to ensure that the sound buttons are clear and present right from the start. So as soon as you begin to introduce those basic letter sounds, the flashcard should also show the sound buttons.
For very young students, the sound buttons don’t necessarily need to be talked about or taught explicitly, particularly when you are teaching simple sounds, but their presence will help the student to become familiar with them so they are not a surprise or adding any confusion by being introduced later on!
Once you have introduced all the consonant sounds and simple vowel sounds, you might decide to begin to introduce some digraph sounds. In my experience, it is very important to revise all the sounds a student knows before introducing any more, so that you’re building on previous learning, rather than replacing it with new knowledge!
As you start to expose students to these digraphs, you might begin to explain that the line underneath shows us that the two letters go together to make one sound. you might say,
This line underneath the letters shows us that this is a digraph, which means two letters working together to make one sound! So ‘th’ isn’t said as ‘t’ and ‘h’ but they go together to make the sound ‘th!’
When I have taught phonics, I like to then introduce some simple words with the new sound, so that students can begin to segment and blend and recognise how that digraph will look in a word.

1) Dig for treasure phonics game
One of my favorite phonics games (that I’ve even used in an interview to secure a job!) is always a big hit with students. I like to set this up with different sounds to focus on at each table.
- You’ll need 4 or 5 trays, full of sand. One for each of your tables or stations.
- In each tray of sand, bury some flashcards, along with corresponding images or even real items if you have them!
- The idea is that your students have to dig (either with their hands or with little tools) and unearth a flashcard.
- They then need to use the sound buttons to help them decode the word, and then dig for the picture that matches that word!
So for example, I might have:
Table one focussing on the ‘oa’ digraph, with words and pictures such as coat, goat, float, boat.
Table two focussing on the ‘igh’ trigraph with words and pictures such as high, flight, fight, eight, bright, night.
Table three focussing on the ‘ee’ digraph, with words such as bees, knee, agree, tree and green.
Table four focussing on the ‘ow’ digraph such as cow, now, crown, clown, fowl, down.
Students LOVE any activity that allows them to earn in a kinesthetic way, and this will feel so much like a game they won’t even realise they are learning!
As they finish on each table, have your students hide the words and pictures again ready for the next group, leaving you free to move around the room to listen and assess the pupil’s knowledge!
2) Build a word Lego game
In my experience, this is one of the BEST activities to encourage boys to practice their phonics!
- On a variety of Lego bricks, use a marker to write some graphemes.
- Be sure to include the sound buttons so that the students can practice using them to decode!
- Put all the bricks into a basket, and then challenge your students to build word towers!
- For example, students could use ‘sh’ ‘i’ and ‘p’ to build a tower that reads the word ‘ship.’
- As students become more confident, encourage them to use bricks to build words that have more than one digraph, such as beach, shape, and mouth.
For words that contain the ‘split e’ digraph, you may need to attach two bricks together, but with space in between them to add the middle grapheme.
This can be done with a lolly stick.
To differentiate this activity, try having word cards for students to copy, and to challenge your more able students, challenge them to build some words into a sentence.
3) Phonics scavenger hunt
This is a fantastic activity if you have a class of very active young learners! In advance of this session, you’ll need to prepare a little, by printing some flashcards, and maybe laminating them so they are more weatherproof.
- Place tour flashcards all around your learning area, ideally outside around your playground, or indoors in a hall if not.
- Start a timer, and challenge your students to run and find a flashcard, one card at a time, and bring them back to the start zone.
- Once they have collected a few they should try to see what sounds they can put together to make words!
- Once they have made a word, they should continue to collect flashcards, building as many words as possible!
Sometimes, I ask the students to pair up, to share their flashcards they have collected to work together to make words.
A great way to assess a student’s pure phonics knowledge is to use ‘alien’ words. There are words that are nonsense, but they are phonetically decodable. If a student can segment and blend these words, it shows that their knowledge and understanding of phonics is there, and they are not relying on the context and image in a book to read a word (although both of these are equally important reading strategies!).
Some examples of ‘alien’ words:
- Fess
- Skept
- Wuss
- Clasper
Just make sure that the graphemes you use are ones that the students have had plenty of exposure to , and the ‘alien’ words should always have the sound buttons underneath them when you first introduce them. They can be shown without the sound buttons when a student is nearing the end of their discrete phonics learning journey.
Another way to assess the progress of your student’s learning of phonics with sound buttons, is to complete a summative assessment. In this way, you can find out exactly what phones and graphemes each student knows, meaning that you can plan your lessons specifically to fill the gaps in their knowledge. To ascertain progress, you could try repeating the same summative assessment after a few weeks. By comparing scores, you will (ideally) have concrete figures showing the progress made.
One thing that is important, is that the teaching of phonics with sound buttons is consistent throughout your whole school, from the youngest learners right through to the oldest. There are a number of different phonics teaching schemes available, and they all have slight variations.
By ensuring that your phonics teaching is consistent, your students will be able to use and apply their learning as they move up through your classes, without having to adapt to alternatives in the learning style.
Teaching phonics is such a rewarding experience, because you get to be the person who provides the key that unlocks the world of reading for your students! This is really special, and can be a reminder of why you became a teacher in the first place.
Using sound buttons to teach phonics can make the learning process smoother, easier and overall more simple for your students, meaning that you can move their learning on at the pace that it needs to to ensure that they gain the skills and knowledge necessary to learn how to read.
Sound buttons really are a fantastic tool that can help your students when they are learning how to read, whether this is in their early school life, or perhaps because they are learning English for the first time.

Ruth Litchfield
briefcase iconEducator & Education Content Creator
Ruth is an experienced primary school educator of over a decade, and an Educational Content Creator. She specialises in creating fun and engaging activities that require minimal resources and cover multiple curriculum areas.
Other posts
Want more content like this?
Subscribe for blog updates, monthly video releases, trending topics, and exclusive content delivered straight to your inbox.


